Category: Uncategorized
Eyebrow tester
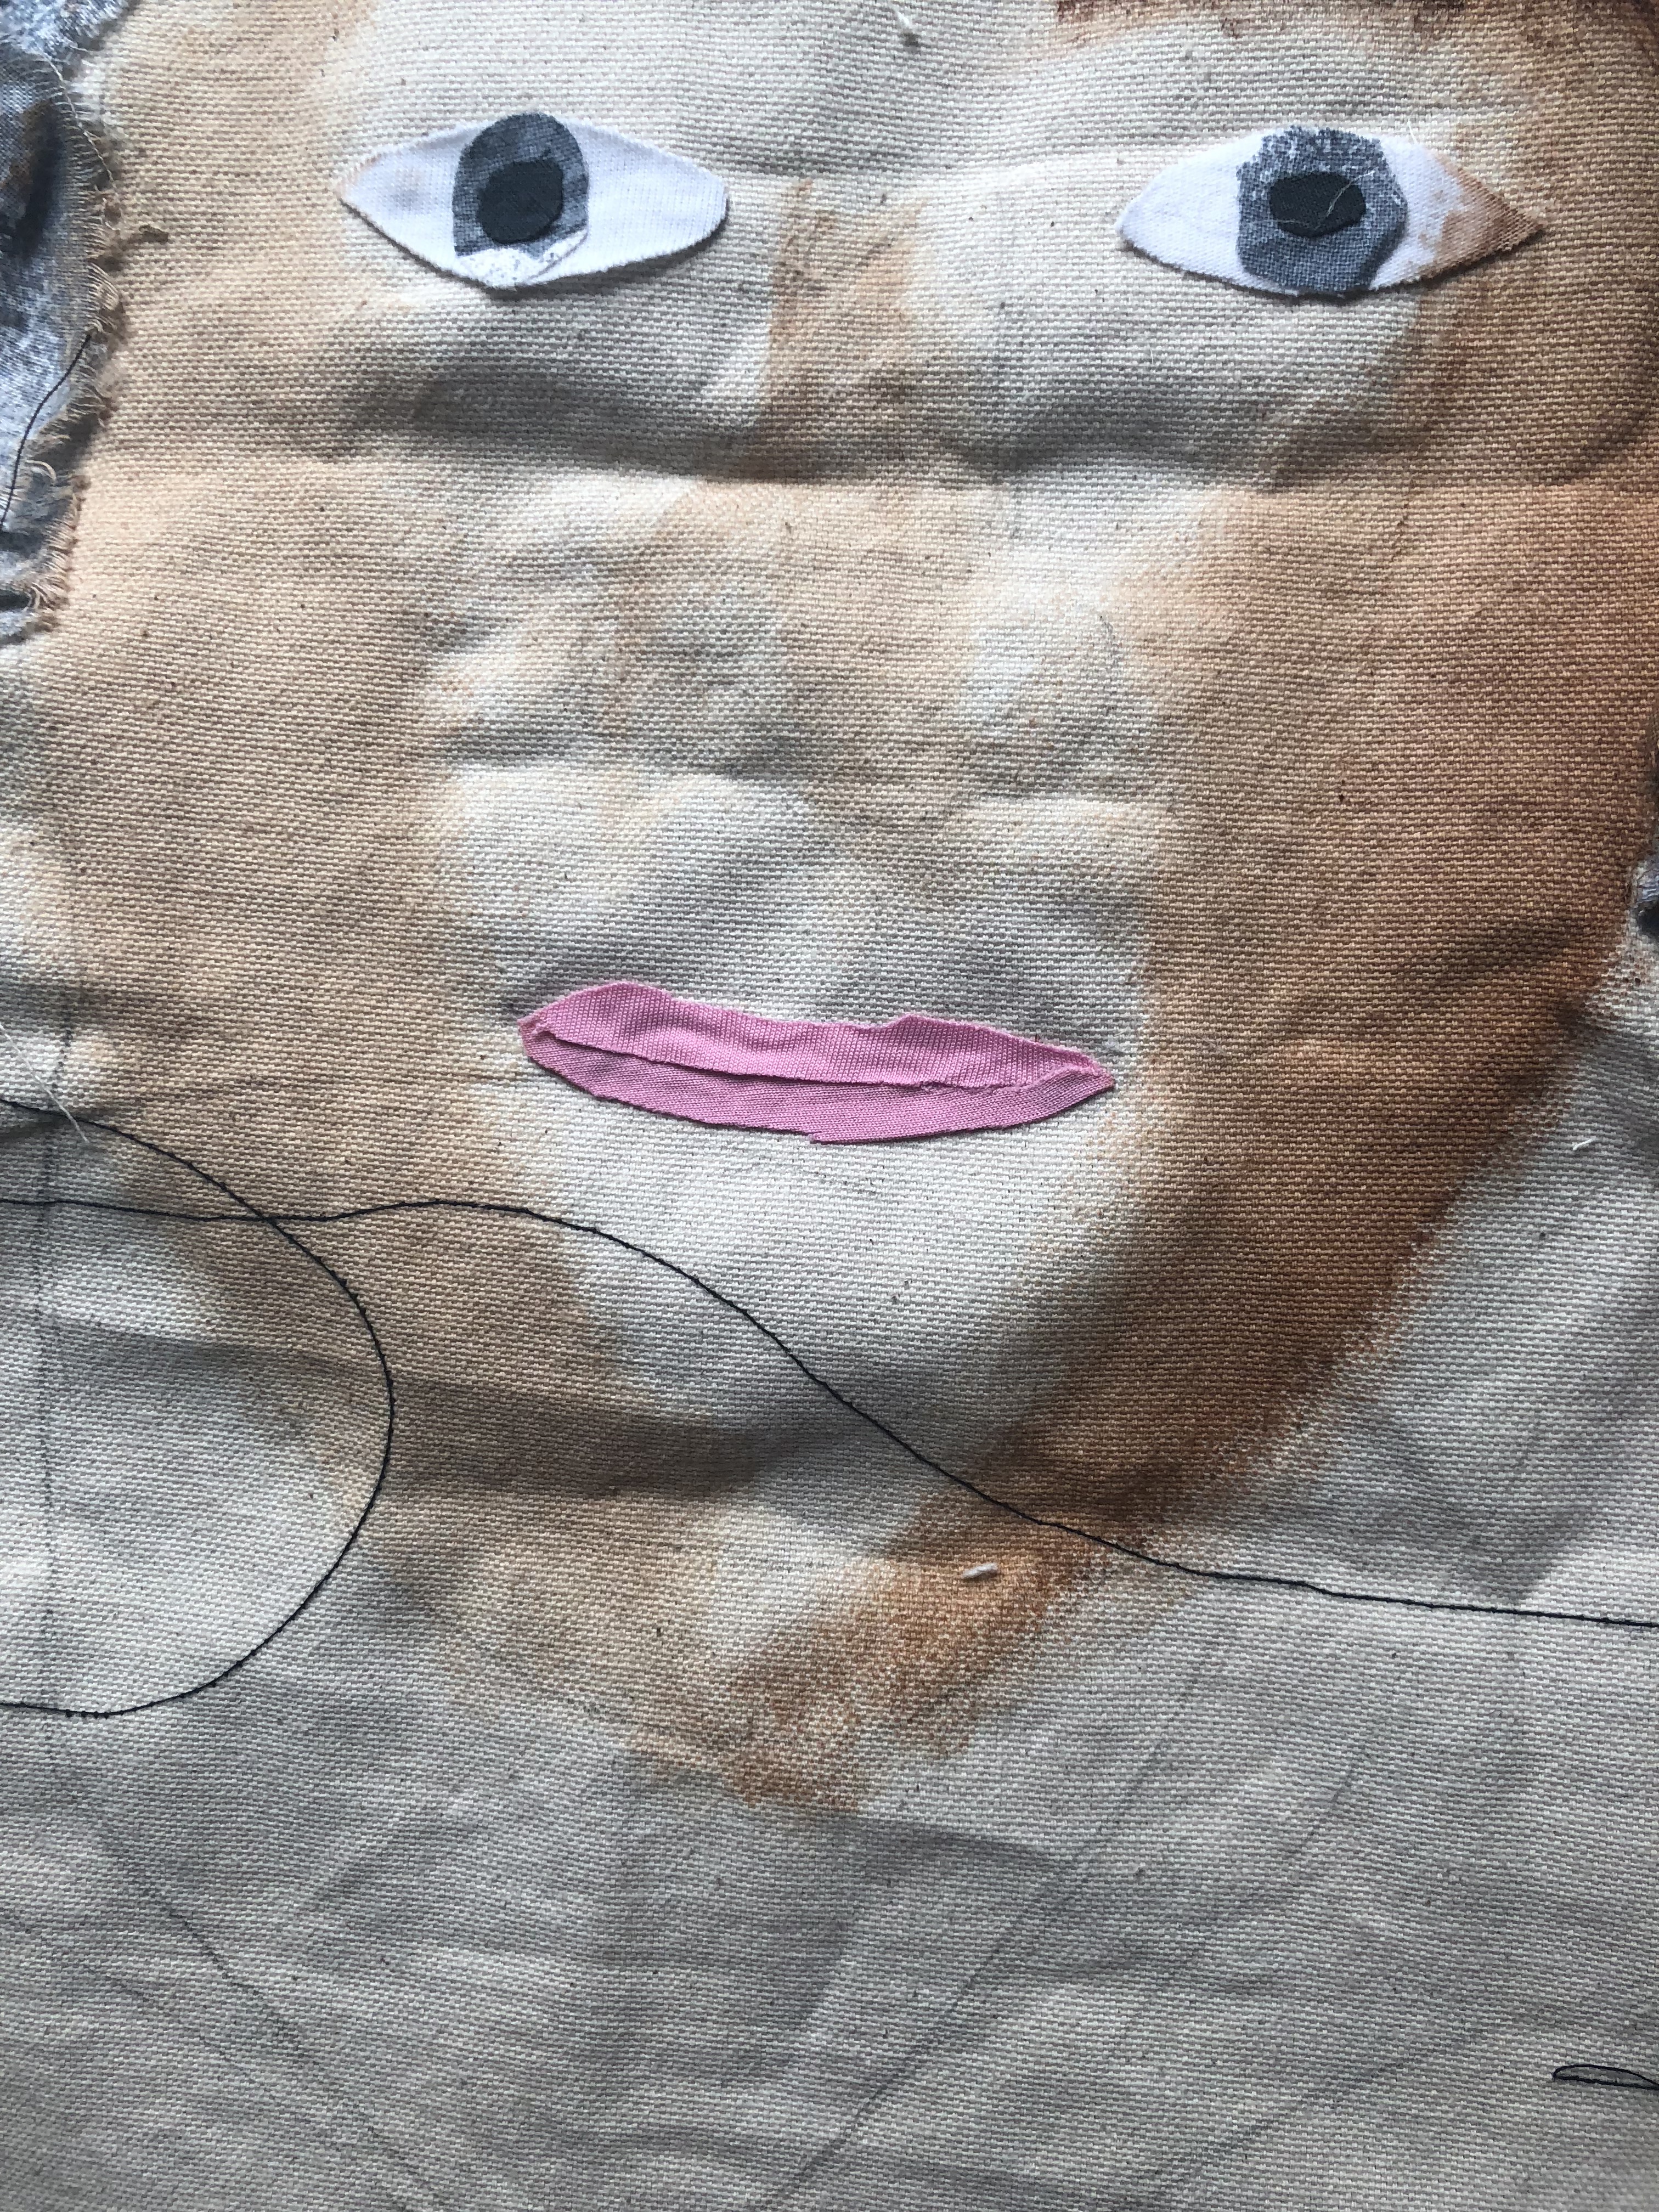
Using an eyebrow brush and paint i tested out adding texture on the skin texter piece. from this i learnt that it was difficult to shape the eyebrows and this left it a bit messy. i also tried cutting out the shape using fabric, this looked fine but i liked the texture from the eyebrow brush. this gave me the idea to paint canvas separately then cut it out like the fabric eyebrow to get a neater shape.
Gary Hume
Gary Hume created a series of ten screen prints in 1998 on commission by Charles Booth-Clibborn published in the Paragon Press. the portraits were based on paintings he had previously created between 1994 and 1998. the original paintings where based on photographs and some from his imagination.

Young Woman 1998 Gary Hume born 1962 Purchased 1998 http://www.tate.org.uk/art/work/P78683

Cerith 1998 Gary Hume born 1962 Purchased 1998 http://www.tate.org.uk/art/work/P78688

Adult 1998 Gary Hume born 1962 Purchased 1998 http://www.tate.org.uk/art/work/P78689
Skin tone tester
As the variety of people have different skin tones i wanted to test painting the canvas on a piece that i wasn’t going to include. i made a wash of paint and spread it out on the canvas. this didn’t look quite right so i decided to just leave the canvas plain for each of the portraits.
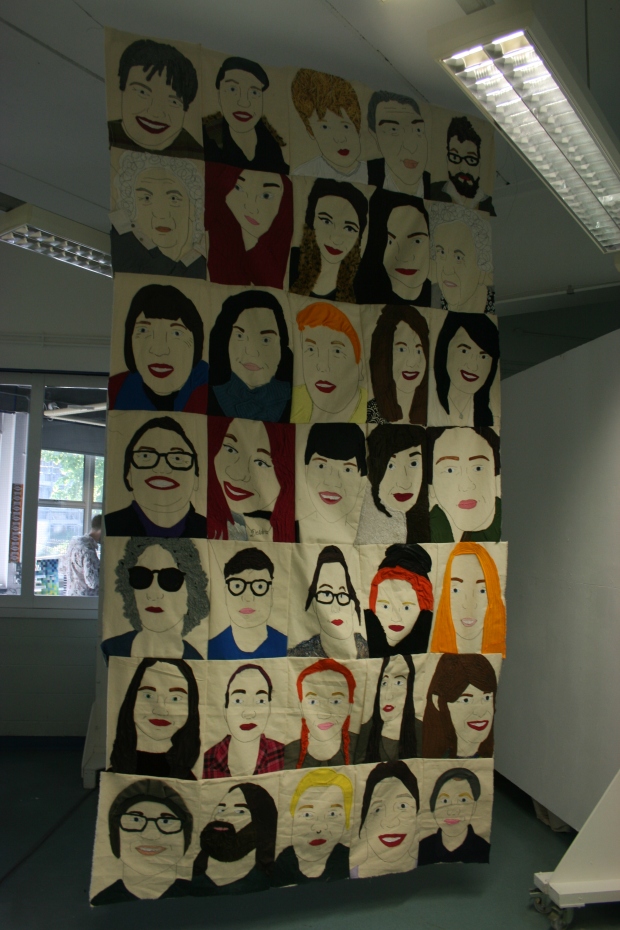
Picture layout
i printed out all the portraits in black and white to test out the layout from doing this i discovered i needed more faces to be able to have an even piece. i may not do it as wide as this as the actual portraits are bigger than the print outs so the piece may look too wide. for the final portraits i took one of another school mam, the final member of the college group and one of my great aunt who had died just before easter so i thought it would be a nice tribute to her.
Final Photos
I Collected the final photos that i still needed to include. this included my close friends, my son, myself and a few more school mam friends.
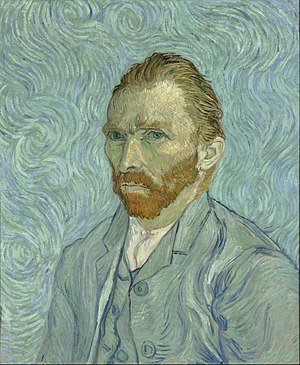
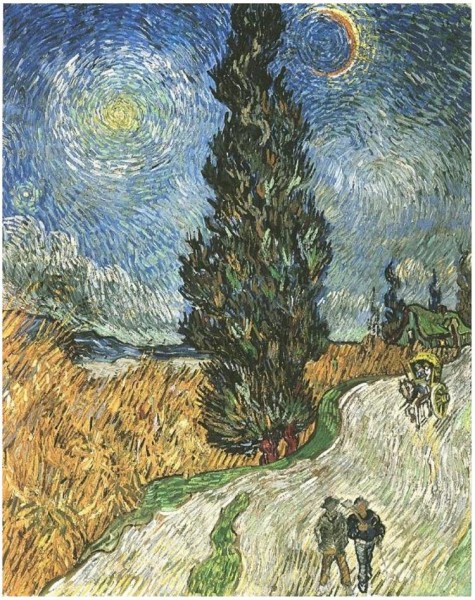
Van Gogh
 Van Gogh had a hard life starting from his birth. He was named after his parents first born child, who was a still born a year to the exact date that Van Gogh was born, they even gave him the same name. Throughout his life he was financially dependant on his younger brother for a lot of his life. This always left him worrying about the fact that the funds could stop at any time. He also had no luck in his love life. With all of his struggles he turned to art as an outlet. As his skill as an artist grew he began to withdraw more into himself, creating a loneliness he couldn’t handle. By the age of 36 Van Gogh went of his own free will to Saint Paul de Mausole, a hospital for the mentally ill. He was allowed to leave the asylum unaccompanied to work on his art alone. He suffered from epileptic fits, during his attacks he suffered from hallucinations and would become violent. He used his artwork to drag himself out of his depressions, this art at this time did not reflect his illness, they were his attempt to not give up. They also helped him connect with life. He died from a fatal gun shot to the chest. on his death bed he claimed the gun shot to be a suicide attempt, however there is some speculation that he was shot but protected the person who shot him.
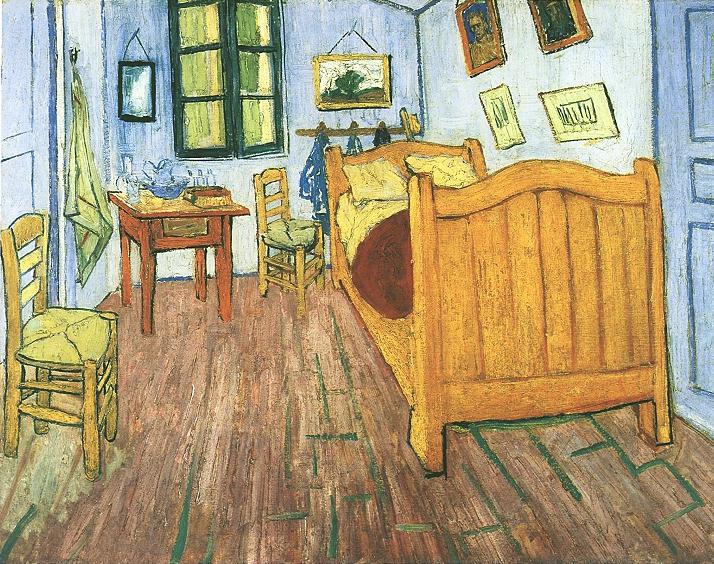
What i like about Van Gogh’s paintings is that he has a certain playfulness with his style and colour. Even though he was a man who was suffering he saw the world as a beautiful place. You can see this in his use of colour and his careful brush strokes. I like that he used his art as an escape from life, but avoided projecting his suffering onto the paintings.

Alain Guerra And Neraldo De la paz
Both born in Cuba the two artists have been working together since 1996 under the nom de plume Guerra de la paz, a combination of their two surnames. This translates from spanish to ‘War of Peace’. They use second hand clothing to produce their artworks, this came about when they moved into a studio together near businesses that would throw away a lot of clothing on a daily basis.
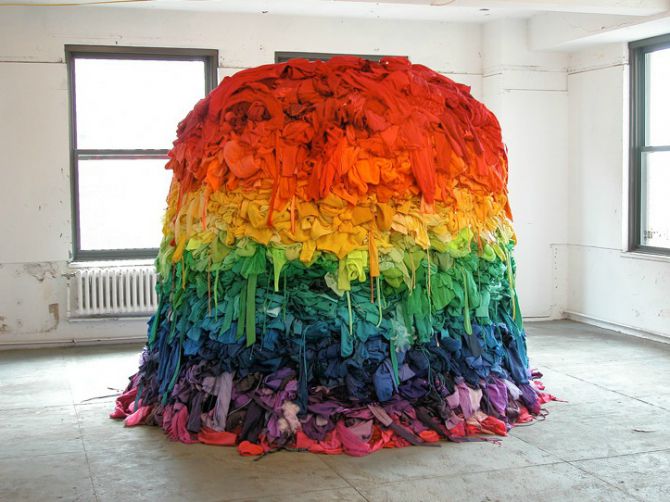
Tribute is a piece to serve as a “memorial ti people we did not know, cannot recognise or cannot remember” it is a ever evolving piece that they add onto every time they have to reinstall the piece.
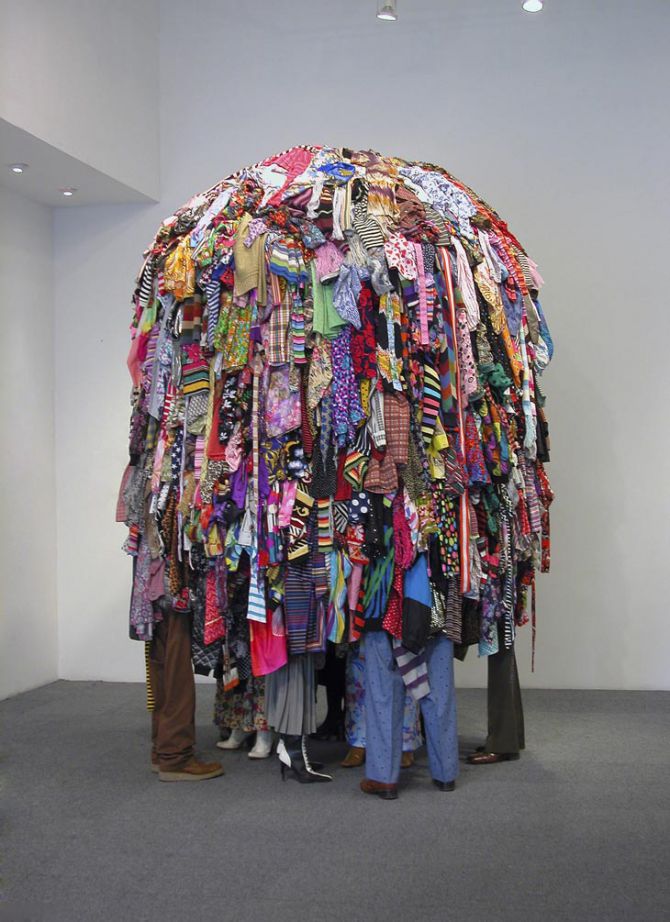
Nine has the overall theme of unity. The huge mass of clothing is to represent the disowned memories, the legs that can be seen underneath the mass are representative of the strength and value of community, as together they are capable to support the weight of the large mass above them.
Idea Development – The mad hatter
For the underneath shape of the mad hatter i wanted to create a plaster cast of a human form to better get the shape of a human out of the hats. I had seen a student’s final piece consist of such a plaster cast in previous years so knew a technique was possible. To make the cast you need a person, a sheet and some plaster. Wearing old clothing and a swimming cap i decided i would be the model for the cast. I sat down in the position i wanted the figure to be in, while the old bed sheet i had bought was being soaked in plaster. The sheet was then draped over me and positioned correctly making sure that you could see that it was a figure but also leaving me enough room to breath underneath.


A bucked of PVA glue and plaster was then mixed up. The PVA was added to the plaster to increase the elasticity of the plaster so that it wouldn’t crack too much. This bucked was then poured over the top of me and the sheet as there wasn’t enough plaster covering the whole sheet already. This layer of plaster was then left dry fully to see if it was hard enough or if it needed more


When this layer was fully dry it wasn’t quite strong enough in quite a few places. So two more buckets of PVA and plaster where mixed up and poured over me. Again this layer was left to fully dry. once dry it was finally hard enough, A few people helped to peel the plaster that was sticking me to the sheet off and then the cast was lifted off me and i crawled out. The cast remained without me inside of it is so much better than i expected it to be. I feel that my original plan for gluing the hats all over it will ruin the piece. so i need to rethink what i will do with the hats, as it still needs that hatter element to it, i am currently thinking that i will place the hats around the bast of the figure so that it still looks like the hatter is madly woking on these hats.


Being cast under a sheet for nearly a whole hour was such a surreal experience. The calm glow of light coming through the sheet, and the warm heat from the plaster. Being completely unable to move any body part for that length of time was painful. for something that could have been quite an alarming thing for some people, i found it almost peaceful (minus the pins and needles) to be stuck for such a long amount of time, where time seemed to pass by quicker than it did. 10 real minutes seemed to only be 2 minutes to me.

Once i got the backdrop for my installation room complete i was able to move the cast into the space and remove it from the dirty sheet. I then scattered the hats i had collected around the base of the figure. I am happy with the outcome of this piece and feels that it is extremely creepy and ghost-like.

Idea Development – The mushroom
I needed to make the mushroom for the Caterpillar to sit upon. To make the mushroom i began by taking a piece of paper and marking out how big the caterpillar was as the top of the mushroom needed to be big enough to fit the caterpillar. I was then going to build the shape out of newspaper and mod roc much like the Rabbit head. However when i was busy with this i noticed one of the hats i had for my mad hatter piece looked very close to a mushroom shape already. I tested the caterpillar on it and it fit perfectly. The next step i needed to figure out was the stalk of the mushroom, i was thinking i was going to have to use wood or something similar, when i then noticed these empty pots. They fit perfectly into the hat and there was stacks of them that i could use.


I took a small stack of them and pulled off their handles. Then using a glue gun i attached a few of them all together. I put the hat on top of the stack to check if i was happy with the height of the mushroom. I then rolled it in the paper i had originally started using as to not waste it. The paper helped to cover the ridges of the pots giving me a flat, even surface to work on.


Once the pots were rolled in the paper they made the perfect shape for the stalk of the mushroom. Using empty cigarette cases i created a alternating pattern all the way around the whole stalk. The reason i used cigarettes is to make it fit in with the Vape tank caterpillar as it is a form of smoking.


For the underneath of the mushroom head i wanted to add more of the empty cigarette cases to it to create the look of ‘gills’ of a real mushroom. I tried 3 different patterns with the cigarettes. i decided that the one with the filter ends sticking out at the end looked best, so i went around with a glue gun sticking them around with small gaps in between to add some shading to each side. I think this worked well and helped it look like a real mushroom.


To finish off the top of the mushroom i first cut up the packaging from the vape pens as they had labels on them stating that the product contained nicotine, i haphazardly glued these on all over. I then got all the empty cigarette packages i had gathered and spaced them out around the hat. I left the centre of the hat empty as this is where the caterpillar will be sitting so it needed to be left as a flat surface. With the top of the mushroom complete i only needed to glue it onto the stem i had previously made. I am pleased with the outcome of the mushroom as it fits the caterpillar well.


