Idea Development – The backdrop

Once i had been given the space where my installation would be for the final show, i needed to work on the setting for the room. I was going to paint backdrops onto some canvas stapled to the walls, i even got as far as to hanging up a whole wall of canvas. However, i hadn’t a clue what i would actually paint. Im not the strongest of painters and didn’t want the backdrop to end up ruining all the pieces i had made. But the space needed something as the white walls wouldn’t transport the viewers into Wonderland. I settled on buying fabric as it was the quickest and easiest route. I also feel that it would look better in the long run for the installation. I chose fabrics that looked almost like victorian wallpapers as they felt best suited for the job. Using a wooden stick the height of the walls, with the aid of my Dad we cut lengths of the fabrics. We then went around with a staple gun attaching the lengths to the wall. Instead of stapling the whole fabric we let it drape down, only attaching it to the top. Giving the fabric some natural folds.


We covered the walls in three different fabrics. I feel the fabrics worked well with each other as they are all similar in colour. They really helped transform the space. Before the show i need to work on the door and the flooring next as they stand out a bit too much in the space. 


As i had been given a room, as apposed to a space i no longer needed to worry about creating a curtain. The room i have chosen has a doorway without a door. The tunnel fits perfectly into the doorway. Using some of the fabric from the walls i covered the remainder of the doorway above the tunnel so that you can’t see into the space until you enter it. In the room there is also a second door that can be used as an alternative for people unable to crawl through the tunnel, as well as serving as an exit to the installation.

Idea Development – The mad hatter

For the underneath shape of the mad hatter i wanted to create a plaster cast of a human form to better get the shape of a human out of the hats. I had seen a student’s final piece consist of such a plaster cast in previous years so knew a technique was possible. To make the cast you need a person, a sheet and some plaster. Wearing old clothing and a swimming cap i decided i would be the model for the cast. I sat down in the position i wanted the figure to be in, while the old bed sheet i had bought was being soaked in plaster. The sheet was then draped over me and positioned correctly making sure that you could see that it was a figure but also leaving me enough room to breath underneath.


A bucked of PVA glue and plaster was then mixed up. The PVA was added to the plaster to increase the elasticity of the plaster so that it wouldn’t crack too much. This bucked was then poured over the top of me and the sheet as there wasn’t enough plaster covering the whole sheet already. This layer of plaster was then left dry fully to see if it was hard enough or if it needed more


When this layer was fully dry it wasn’t quite strong enough in quite a few places. So two more buckets of PVA and plaster where mixed up and poured over me. Again this layer was left to fully dry. once dry it was finally hard enough, A few people helped to peel the plaster that was sticking me  to the sheet off and then the cast was lifted off me and i crawled out. The cast remained without me inside of it is so much better than i expected it to be. I feel that my original plan for gluing the hats all over it will ruin the piece. so i need to rethink what i will do with the hats, as it still needs that hatter element to it, i am currently thinking that i will place the hats around the bast of the figure so that it still looks like the hatter is madly woking on these hats.


Being cast under a sheet for nearly a whole hour was such a surreal experience. The calm glow of light coming through the sheet, and the warm heat from the plaster. Being completely unable to move any body part for that length of time was painful. for something that could have been quite an alarming thing for some people, i found it almost peaceful (minus the pins and needles) to be stuck for such a long amount of time, where time seemed to pass by quicker than it did. 10 real minutes seemed to only be 2 minutes to me.


Once i got the backdrop for my installation room complete i was able to move the cast into the space and remove it from the dirty sheet. I then scattered the hats i had collected around the base of the figure. I am happy with the outcome of this piece and feels that it is extremely creepy and ghost-like.

Idea Development – The mushroom

I needed to make the mushroom for the Caterpillar to sit upon. To make the mushroom i began by taking a piece of paper and marking out how big the caterpillar was as the top of the mushroom needed to be big enough to fit the caterpillar. I was then going to build the shape out of newspaper and mod roc much like the Rabbit head. However when i was busy with this i noticed one of the hats i had for my mad hatter piece looked very close to a mushroom shape already. I tested the caterpillar on it and it fit perfectly. The next step i needed to figure out was the stalk of the mushroom, i was thinking i was going to have to use wood or something similar, when i then noticed these empty pots. They fit perfectly into the hat and there was stacks of them that i could use.


I took a small stack of them and pulled off their handles. Then using a glue gun i attached a few of them all together. I put the hat on top of the stack to check if i was happy with the height of the mushroom. I then rolled it in the paper i had originally started using as to not waste it. The paper helped to cover the ridges of the pots giving me a flat, even surface to work on.


Once the pots were rolled in the paper they made the perfect shape for the stalk of the mushroom. Using empty cigarette cases i created a alternating pattern all the way around the whole stalk. The reason i used cigarettes is to make it fit in with the Vape tank caterpillar as it is a form of smoking.


For the underneath of the mushroom head i wanted to add more of the empty cigarette cases to it to create the look of ‘gills’ of a real mushroom. I tried 3 different patterns with the cigarettes. i decided that the one with the filter ends sticking out at the end looked best, so i went around with a glue gun sticking them around with small gaps in between to add some shading to each side. I think this worked well and helped it look like a real mushroom.


To finish off the top of the mushroom i first cut up the packaging from the vape pens as they had labels on them stating that the product contained nicotine, i haphazardly glued these on all over. I then got all the empty cigarette packages i had gathered and spaced them out around the hat. I left the centre of the hat empty as this is where the caterpillar will be sitting so it needed to be left as a flat surface. With the top of the mushroom complete i only needed to glue it onto the stem i had previously made. I am pleased with the outcome of the mushroom as it fits the caterpillar well.


Idea Development – The tunnel

As stated in my initial idea for the tunnel my intention was to make it using two hula hoops and some fabric. I got as far as to buying the two hula hoops but during a group critique one of my peers told me they had a kids bed tunnel they were throwing out that i could have. As it was made to go onto a bed it is a fair size, and would probably do the job. When they brought it in for me i saw that it was perfect, however since it was designed for a bed without being attached to it, it layed flat. I took it to the workshop and Johnny suggested that it should be screwed onto two wooden lats and that would solve the issue. As it was designed to be attached to a bed it already had the holes for the screws so it was a quick and simple job.


I am happy with how the tunnel turned out in the end and it works so much better than the two hula hoops ever would have. Next i need to decide if i will change the look of the fabric, this could be achieved by stitching new fabric onto it, or painting it. However at the current time i am considering to just leave it as i like the childish element it brings to the piece.

Idea Development – The Queen of Hearts

For making the Queen of Hearts i decided to go for the mannequin wearing a dress idea as i felt it would work best for the materials i was using. So i ordered a mannequin online, for only £50 it was surprisingly good quality. I took an old dress i owned, i had kept it for sentimental reasons from my previous relationship, but since that relationship is over i felt fine destroying it and felt that it was suited to the rest of the materials i was already using. As the mannequin is very skinny i had to alter the dress so that it would fit her better.


Using a heart shaped cushion cut in half i stitched it onto the chest of the dress. I also added two identical frogs heads to either side to get a bit of symmetry in the dress. Using the sewing machine to attach the teddies was very difficult as even with pins they would move about and was hard to get them exactly where i wanted them. I decided to instead use a glue gun as it would be quicker and i could get them right where i wanted them. I slowly built up the front of the dress using cut up bits of the teddies. I then worked on the back of the dress. Using the other side of the cushion i put it in a similar placement as on the front. Again i then built up the rest of it out of the teddies.


Now that i have fully finished the dress the next step for the queen is to sort out a wig for her so that she is no longer bald, i may also make her a crown to show further that she is the queen of hearts. I am also considering making her a cape out of playing cards however i am unsure if i will actually follow through with this idea as it might be a bit overkill and take away from the objects of the dress.

Idea Development – The Caterpillar

To start the caterpillar piece i looked at pictures of caterpillars to get an idea of what shape they actually are. After this research i decided that the easiest way to achieve the shape of a caterpillar was to use a sock, i chose a blue sock as in the book the caterpillar is described as being blue.

” … her eyes immediately met those of a large blue caterpillar.”

Using teddy bear stuffing i stuffed the sock till it was the desired size that i wanted. I then also stuffed some wire on the inside to give it a bit of movability so i could pose it how i wanted.


I then stitched up the end of the sock, this became the face end of the caterpillar. I used the natural shape of the sock as it was fairly close to the actual shape of a caterpillar. I found out i could buy the vape tank and batteries from various cheap shops so i was able to source enough of them easily to make the piece. It took a lot more of them than i thought it would so i had to take multiple trips to the shops to buy more each time. i stuck them on in rows to make use of the space and to try to fill it a bit quicker. I used the Vape pen batteries to make the legs of the caterpillar aiding in it standing up on its own. I had one old used tank that i was given that was a lot bigger than the ones i bought, this was perfect to glue on as the face and i feel it adds character to the caterpillar.

Idea Development – Cheshire Cat

After a discussion with a friend of mine about my idea for the Cheshire Cat piece they suggested that i could make some plastic teeth rather than using the plaster moulds as it might not quite look right. This got me looking at fake teeth on Ebay, i found out that you can find realistic looking teeth for fairly cheap. This gave me the idea to create a grin with too many teeth. I think this would be a creepier piece than what the plaster moulds could make. so i decided i would buy these and give it a test out, if i didn’t like it i could still always go back to my mould idea.  I am unsure on whether or not the grin will be just a grin suspended in the air, or if i will attach them to a soft toy of a cat.

I ended up deciding on getting a soft toy cat and attaching the teeth to it for the piece as i like having that childhood element to my work and this best worked for the work. I bought a toy cat from a cheap shop, it wasn’t quite what i was looking for at first but after making the piece i think it actually works really well. I stated by using two of the bigger teeth to make the front teeth and build the grin shape stemming from there. Using a glue gun to stick them on one by one. I then filled in the middle of the grin with extra teeth to add that creepy element with their being more teeth than a mouth should initially have.

Idea Development – White Rabbit

To start of making i went with the white rabbit as that was the piece that i knew what shape i was going to be using. I looked up pictures of rabbits and concentrated on what their heads looked like so i could get a rough idea of what i needed to make using newspaper and mod roc.

First off i made very basic shapes out of newspaper for the head and the ears. using thin strips of mod roc i applied at least two layers of mod roc too the newspaper until it felt hard enough everywhere leaving no weak spots. I then moulded the shape of the head a bit better as it is easily mouldable while it is still wet. once i was happy with the shape I left the pieces to dry fully over night.


Once the pieces were fully dried i lined up where the ears would be and cut into the head piece so that the ear could be slotted into place. I then attached them using more thin strips of mod roc. Building up the layers until the ears  felt fully in place and wouldn’t fall out. Again i left this to fully dry and this was the base of the rabbits head complete.


Originally i wanted to use real rabbit fur left over from my ‘Unorthodox” project however i didn’t have any light coloured fur left and if i ordered more i ran the risk of it not arriving in time for the end of the project. While in a shop buying the eyes i found some white fake fur and decided this would be perfect for the piece. I lined the whole of the rabbit head with the fake fur, then attached the eyes, i bought red teddy eyes as in the book the white rabbit is described as having pink eyes, and red was the closest i could get.

“..when suddenly a White Rabbit with pink eyes ran close by her.”

For the inner ears i used the backside of some sheep skin that i had so it still had that element of real fur to the piece. Again using the backside of more fur i had i created a nose for the rabbit too.


I am happy with the outcome of the White Rabbit head however i would have been even happier if the piece had been made using real fur as it would have made it look more realistic and had an overall more uncomfortable feeling. but due to timing i couldn’t risk waiting for the real fur to arrive in time.


Initial ideas

For my project i want to make an installation piece to represent each of the main characters of Wonderland.

The Entrance 

For the entrance to the piece i want to make a tunnel for the viewer to crawl through. This is to represent the rabbit hole and initiate the viewers decent into wonderland. To make the tunnel i am thinking that i will get two hula hoops and some fabric so that it is soft for the viewer to crawl on the floor, i may also buy some padding to help with this. The fabric tunnel may need some sort of frame to keep its shape in the centre so it doesn’t collapse. Currently my plan for the inside of the tunnel is to have cuddly toys lining the inside of the tunnel to represent the sort of things that alice normally sees while falling down the rabbit hole, however these things are normally tables, clocks, bookshelves and other house hold furniture so the toys may not work quite right.

The Backdrop 

Originally as stated in my statement of intent i was going to get some artificial grass stapled to the walls to change the space, however due to budget reasons i won’t be able to go through with this idea. instead i am thinking that i will paint some canvas on the walls to look like grass, trees, flowers ETC. I will however be focusing on the building of all my character pieces before starting on the backdrop. Im doing this as i feel i could end up worrying too much about the backdrop that i would end up wasting too much time and not get my pieces finished and looking how i want them too.

The Cheshire Cat

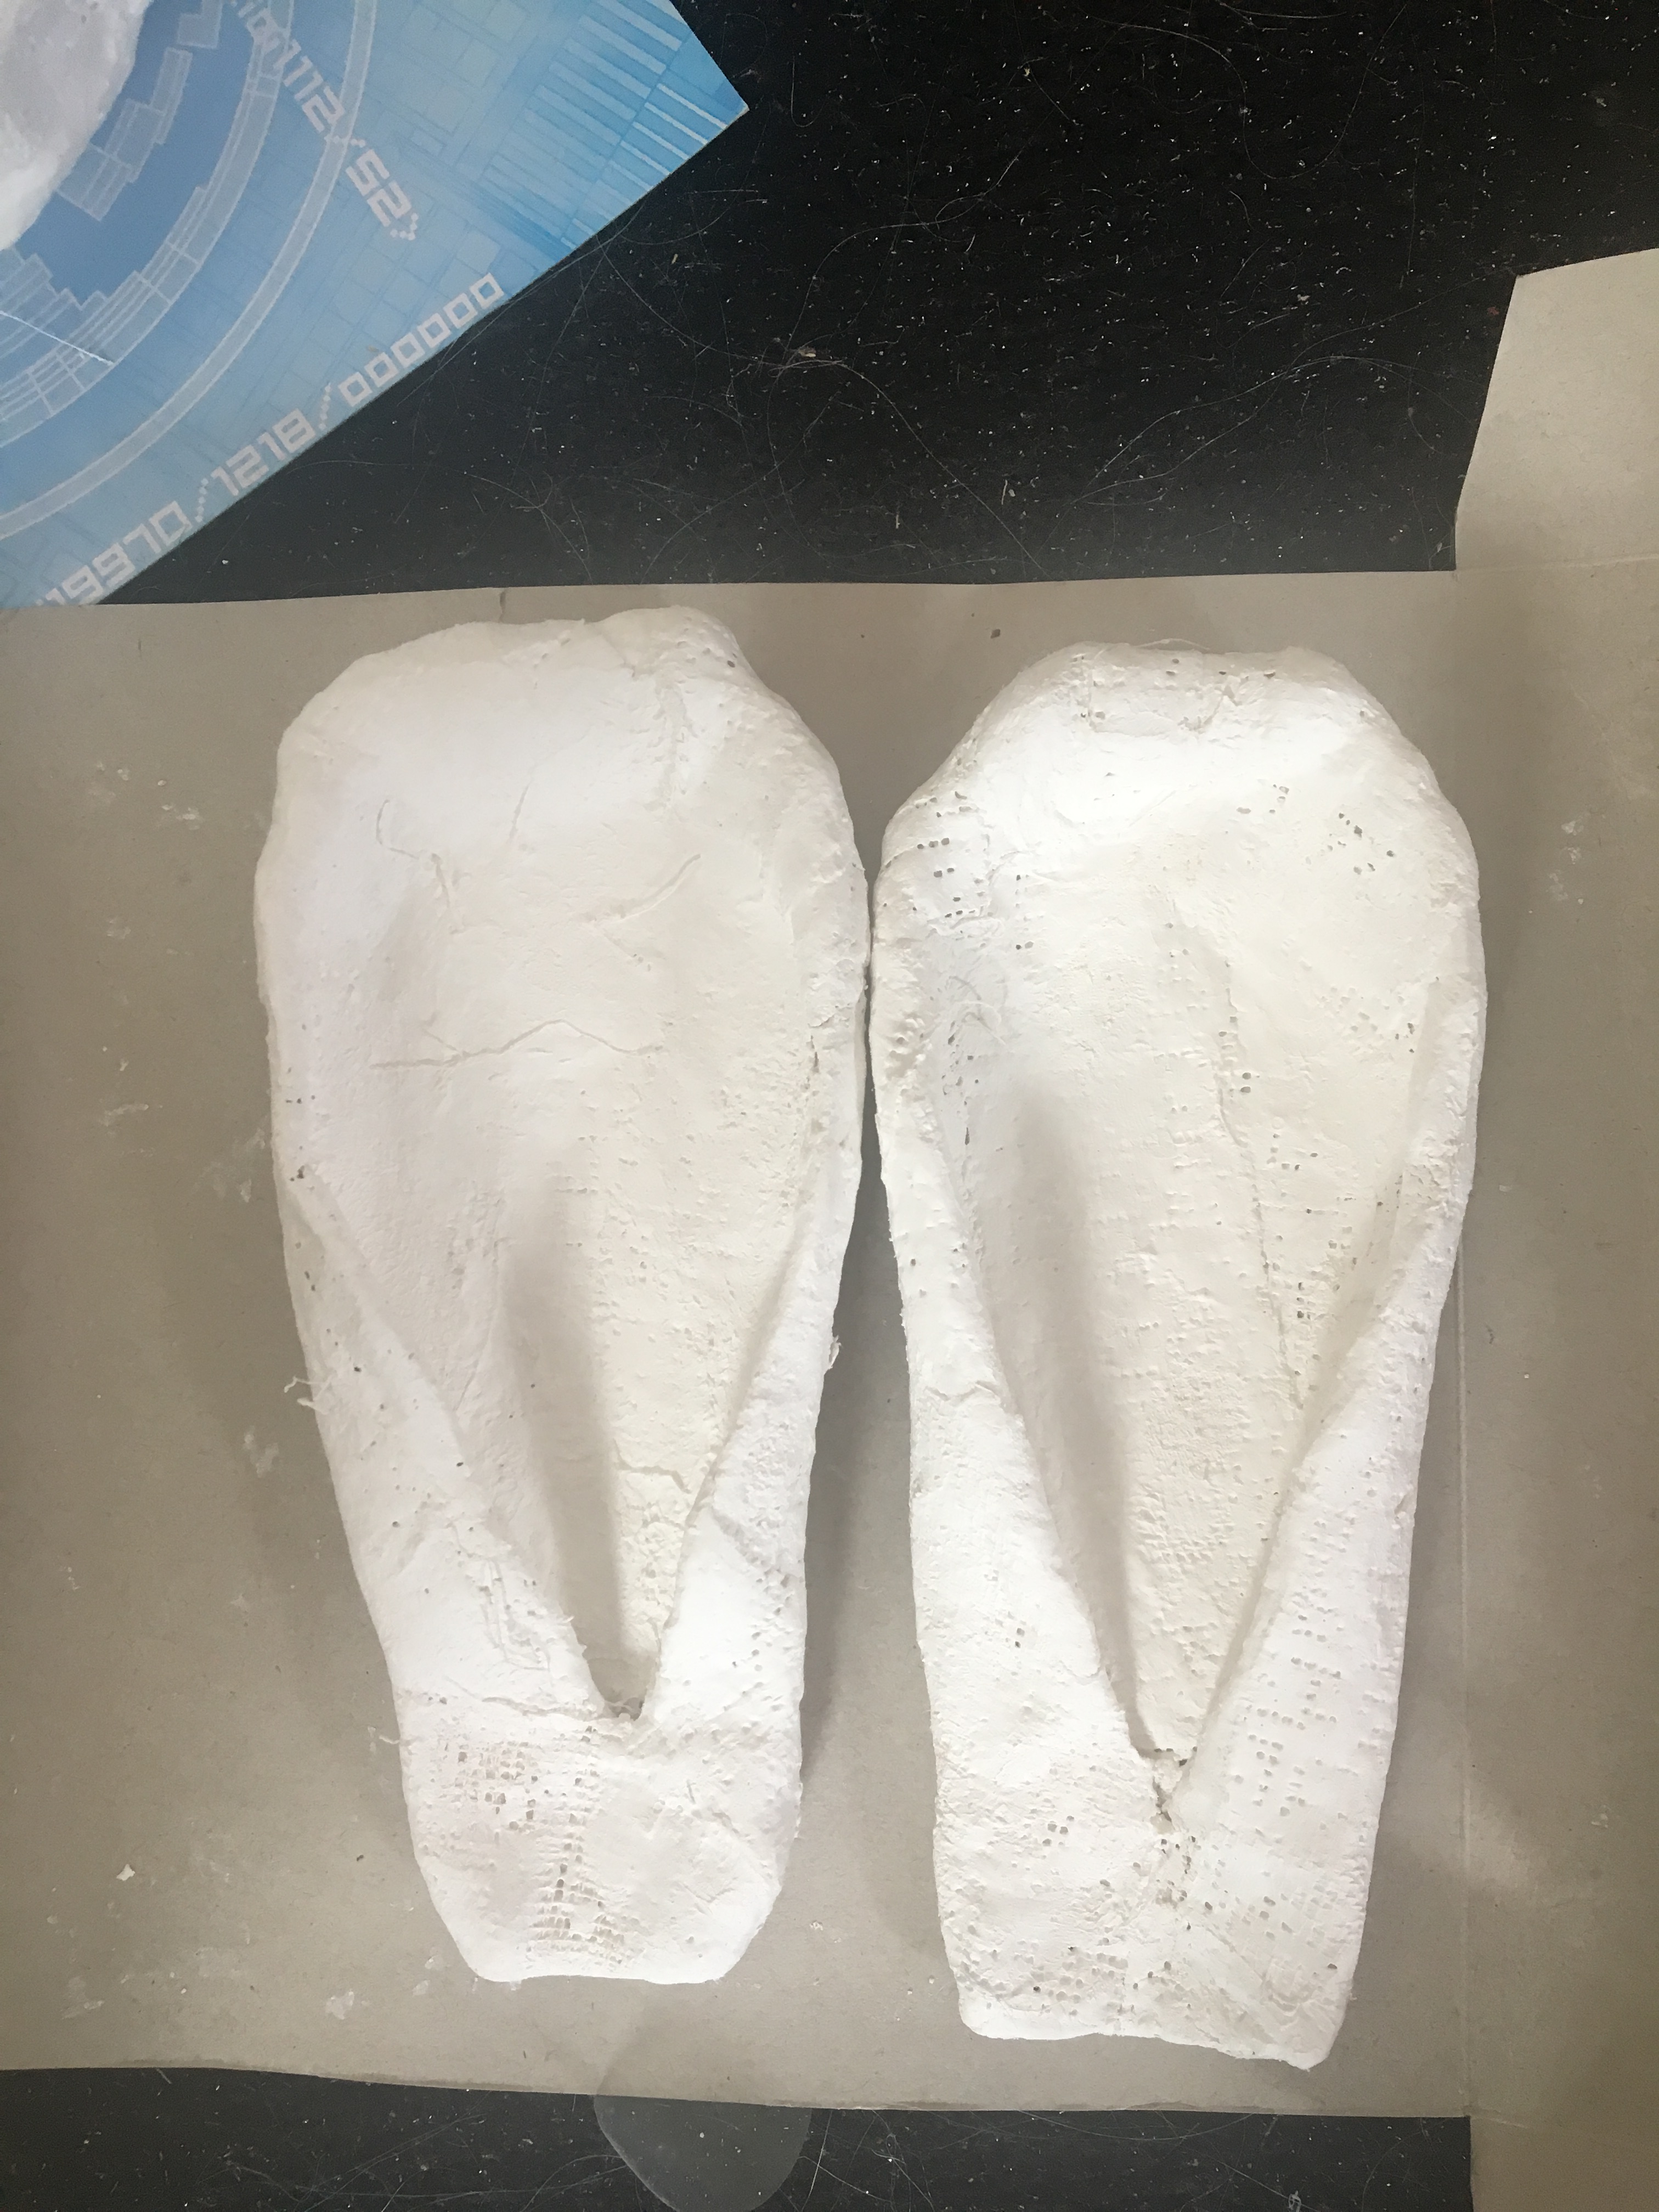
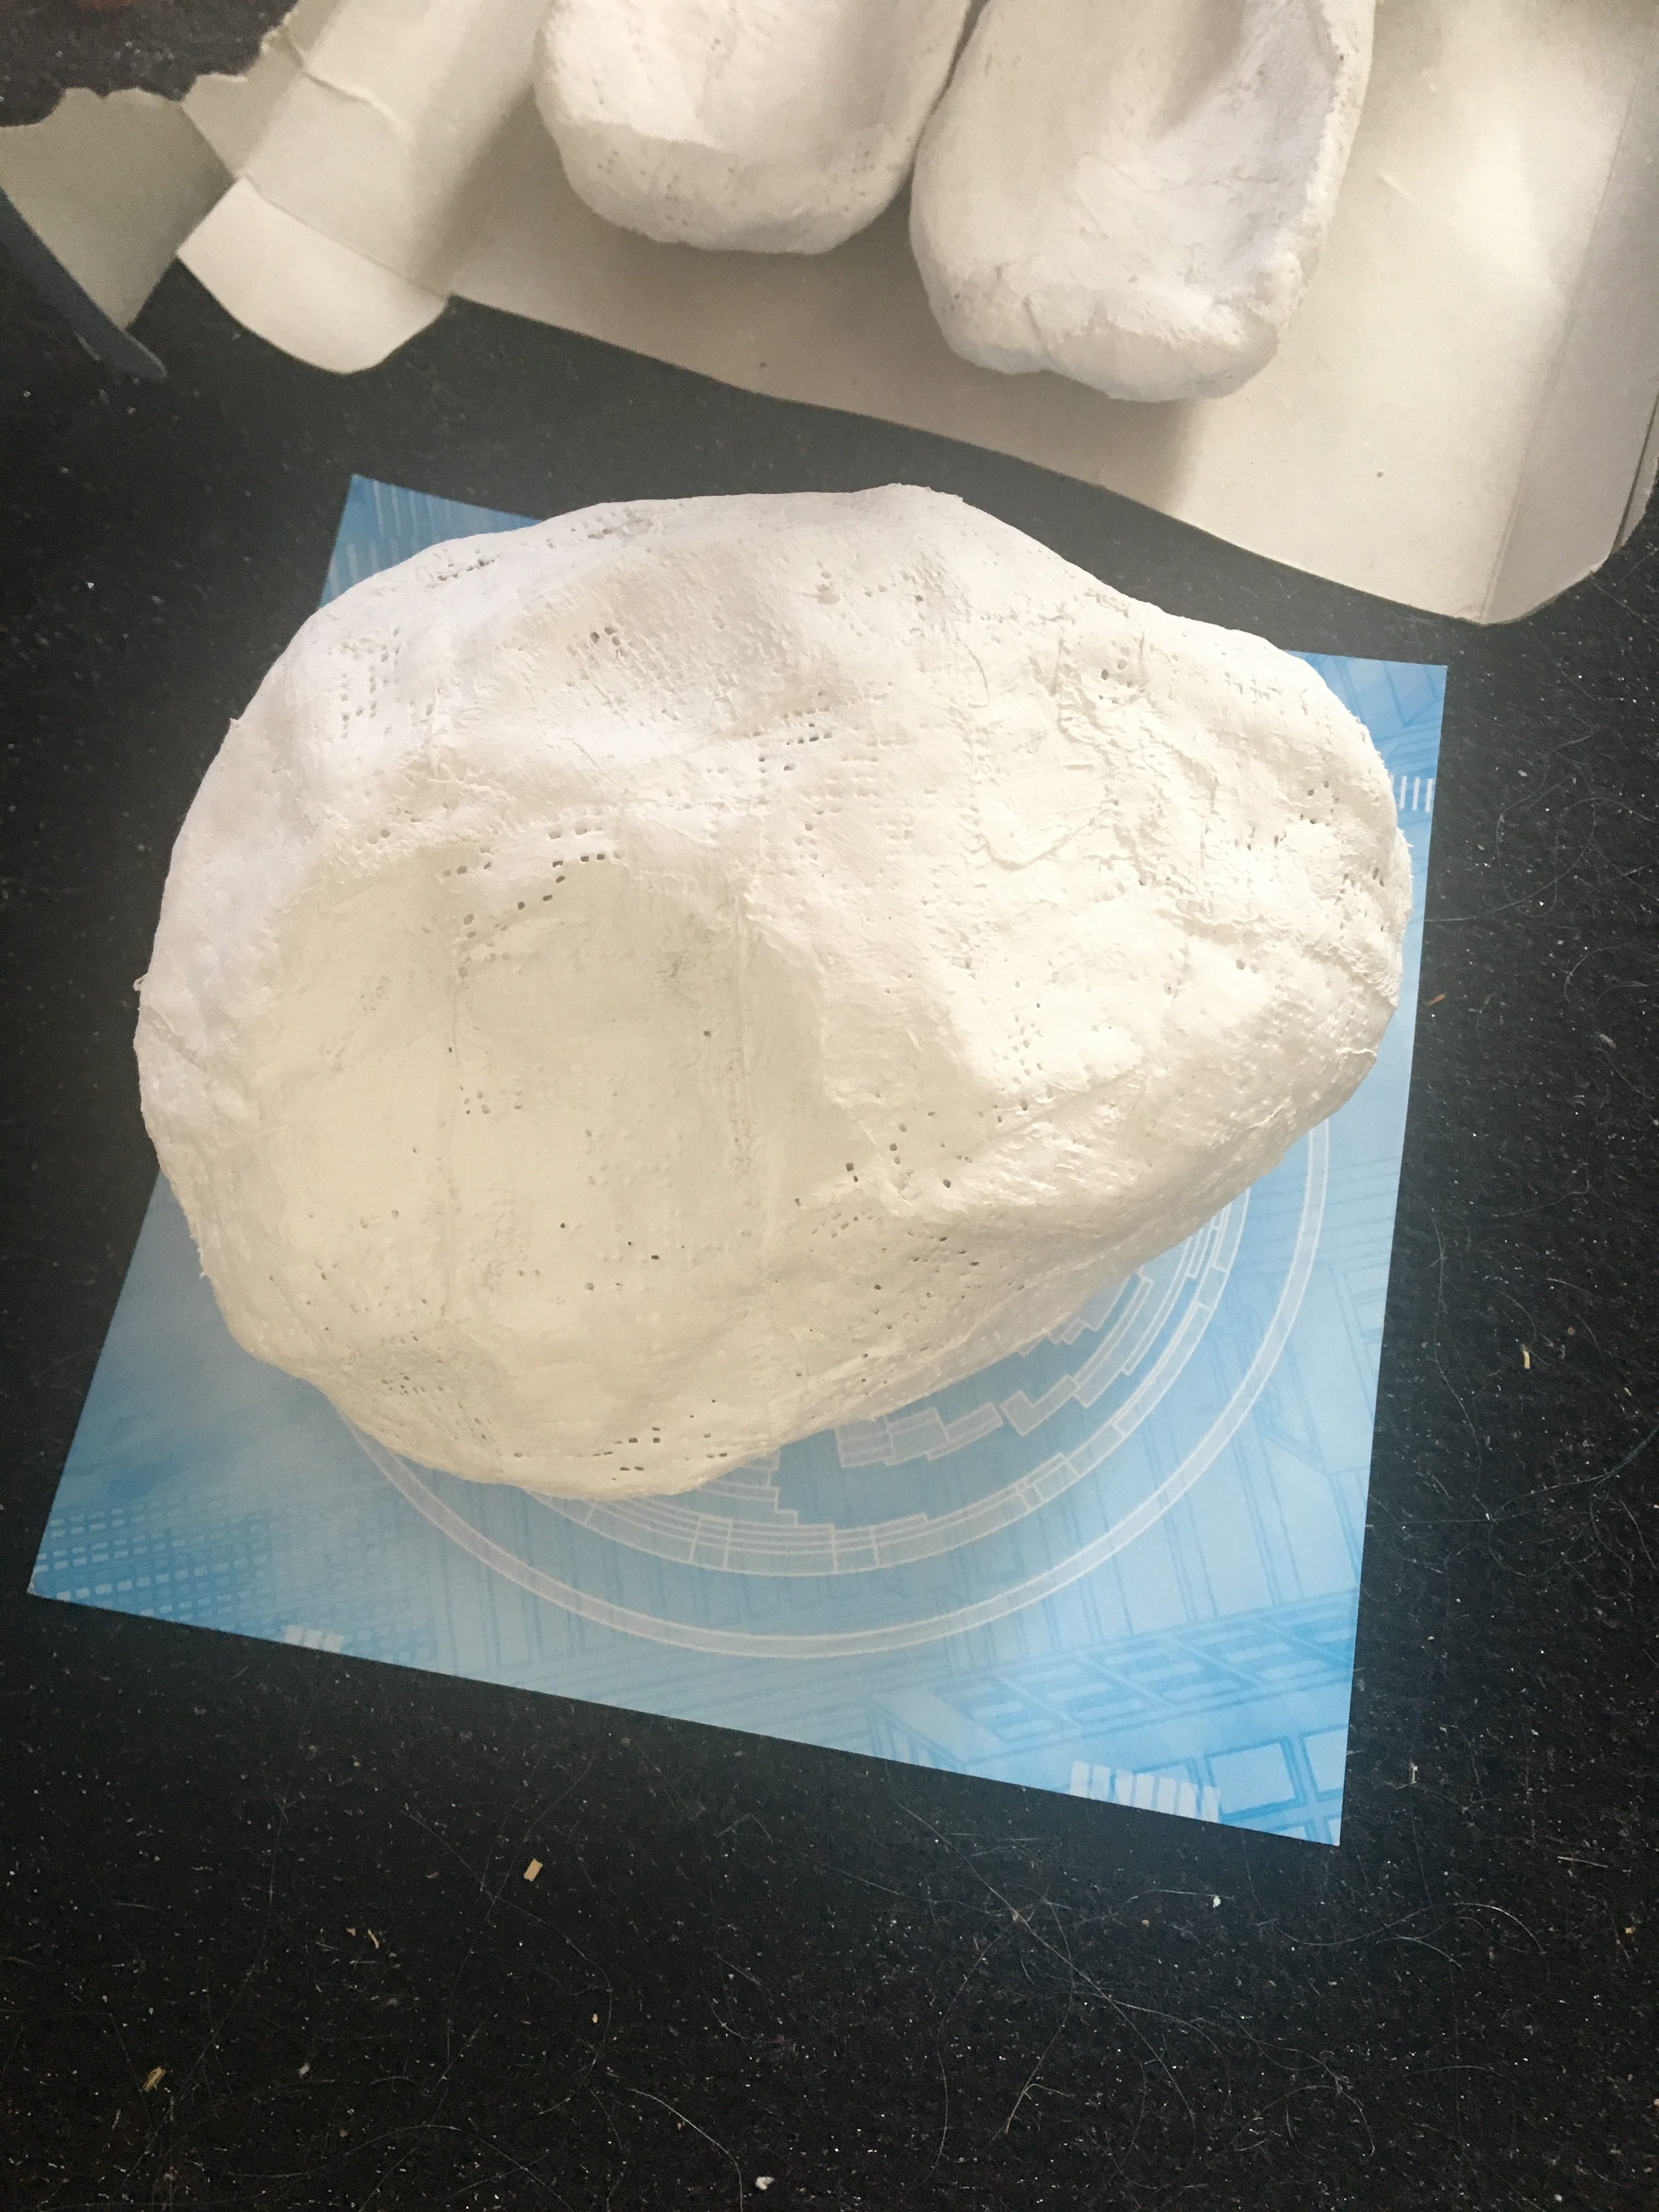
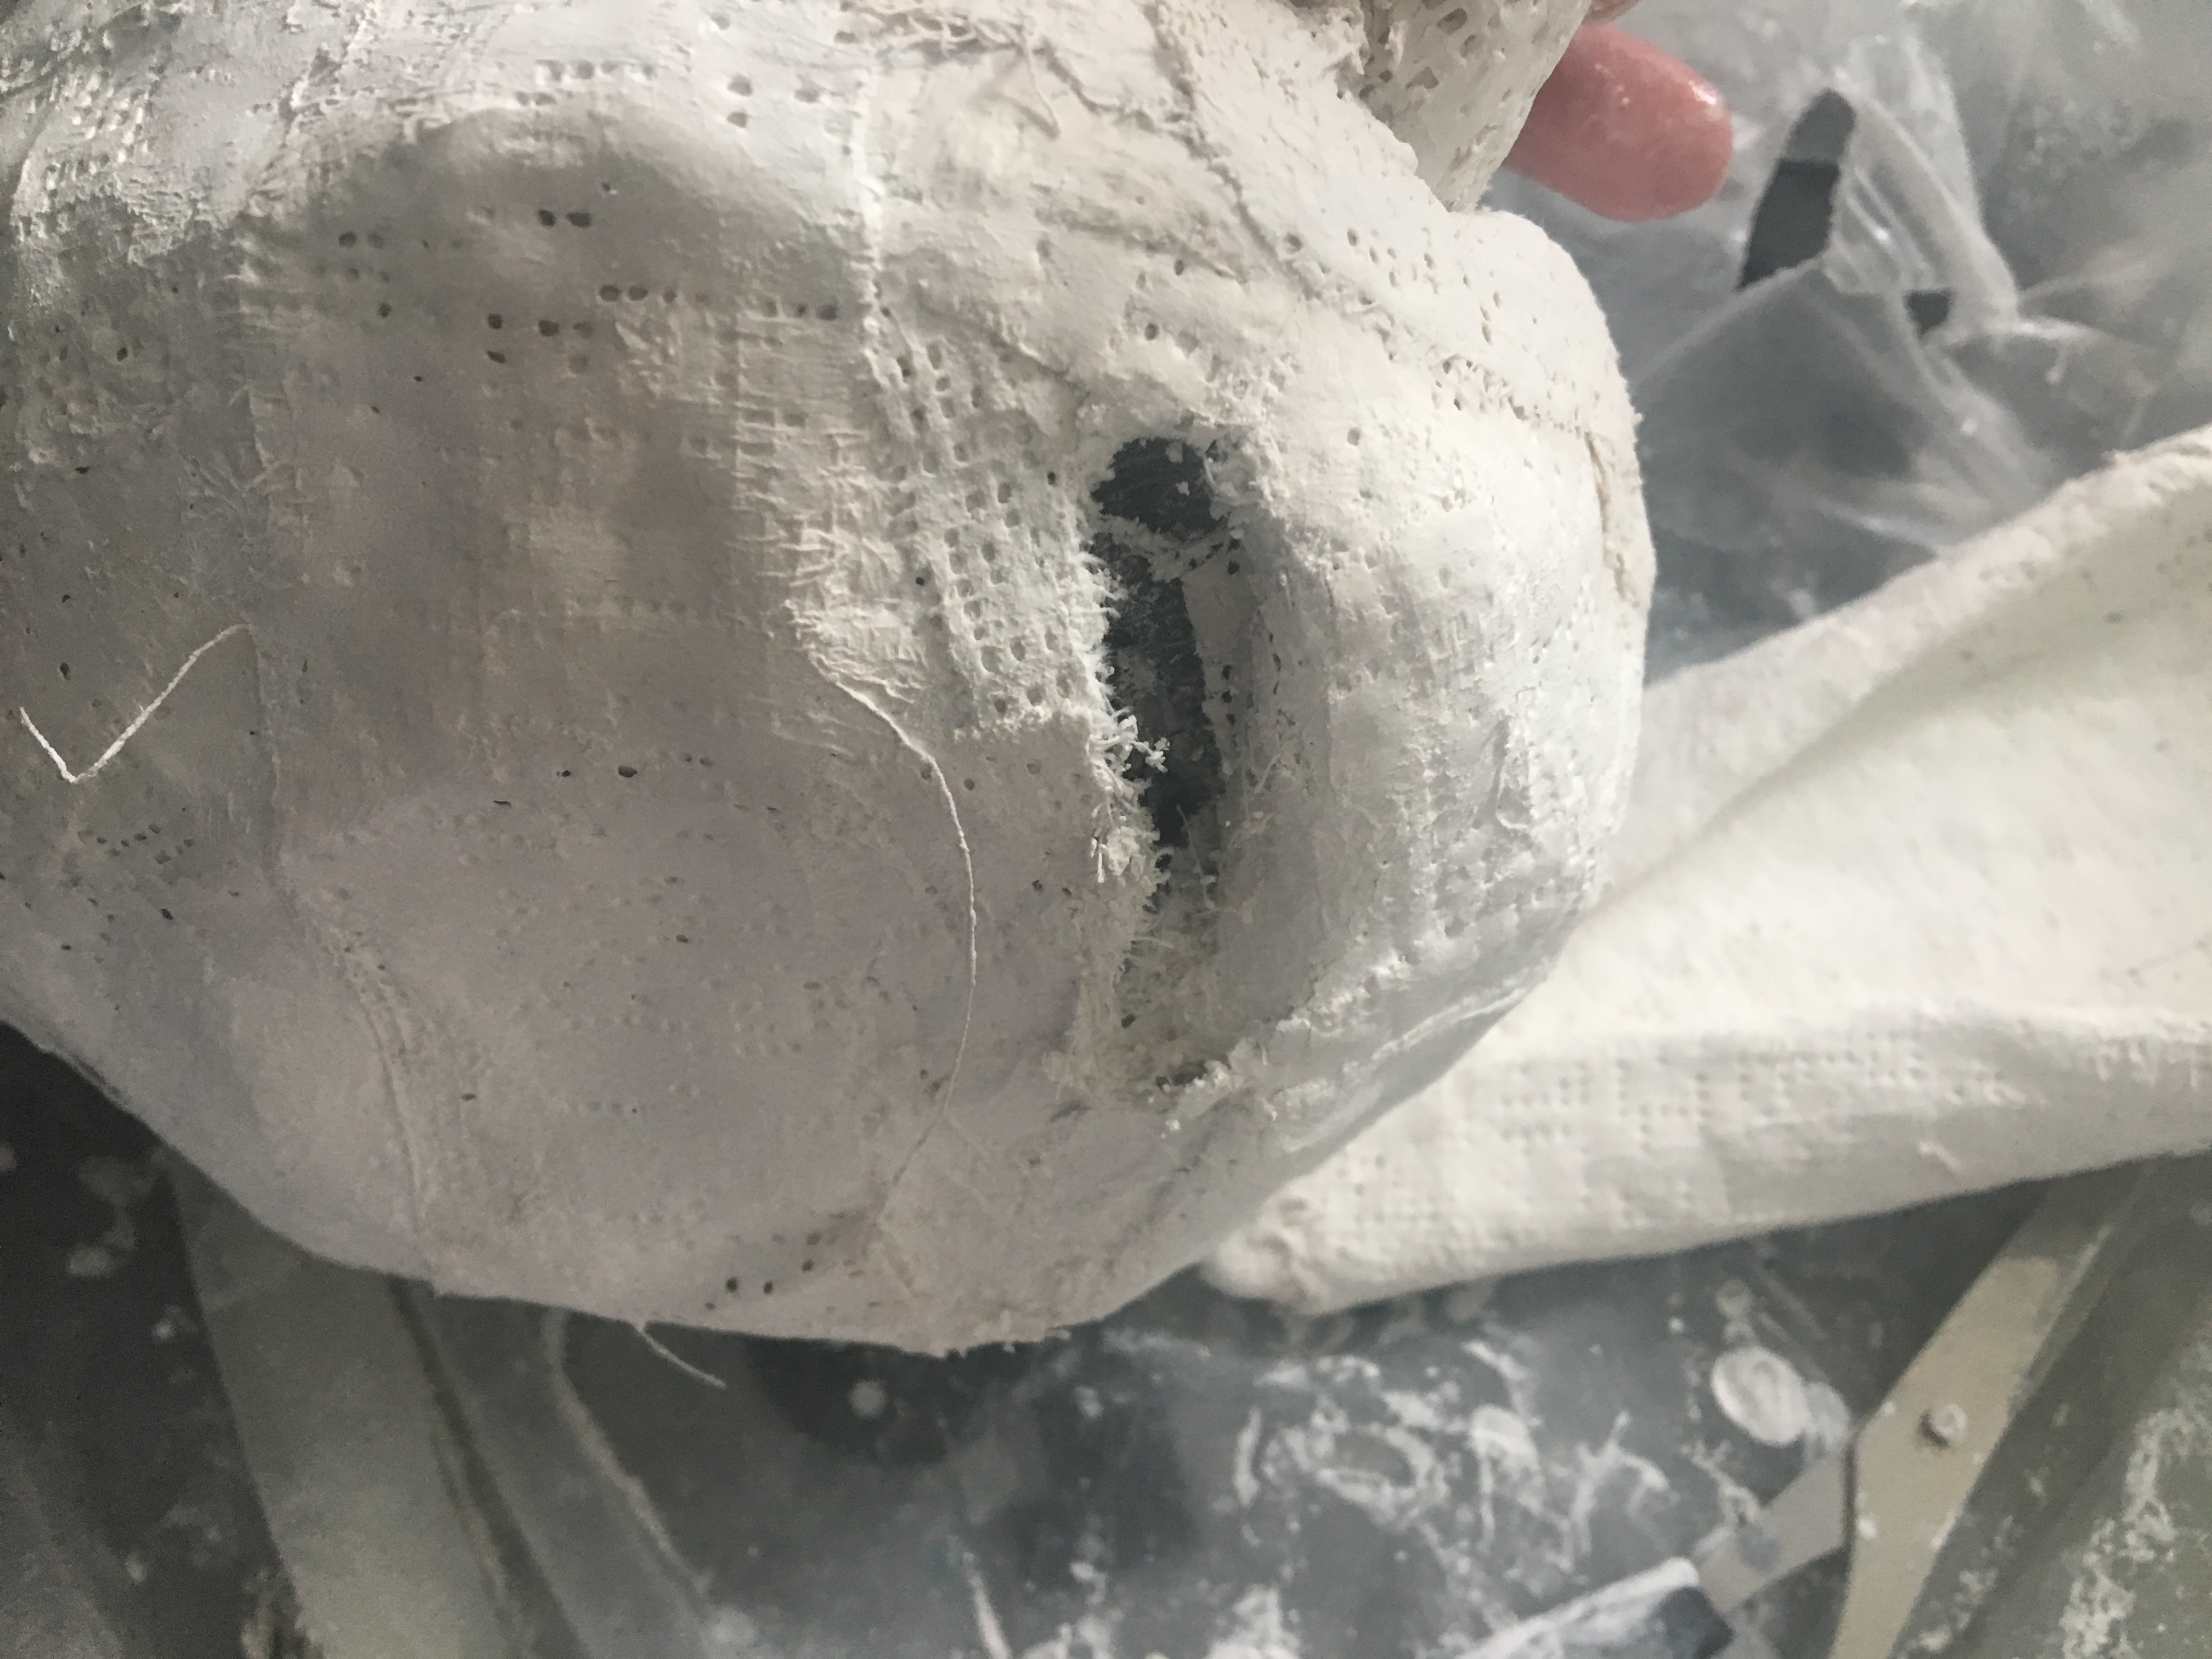
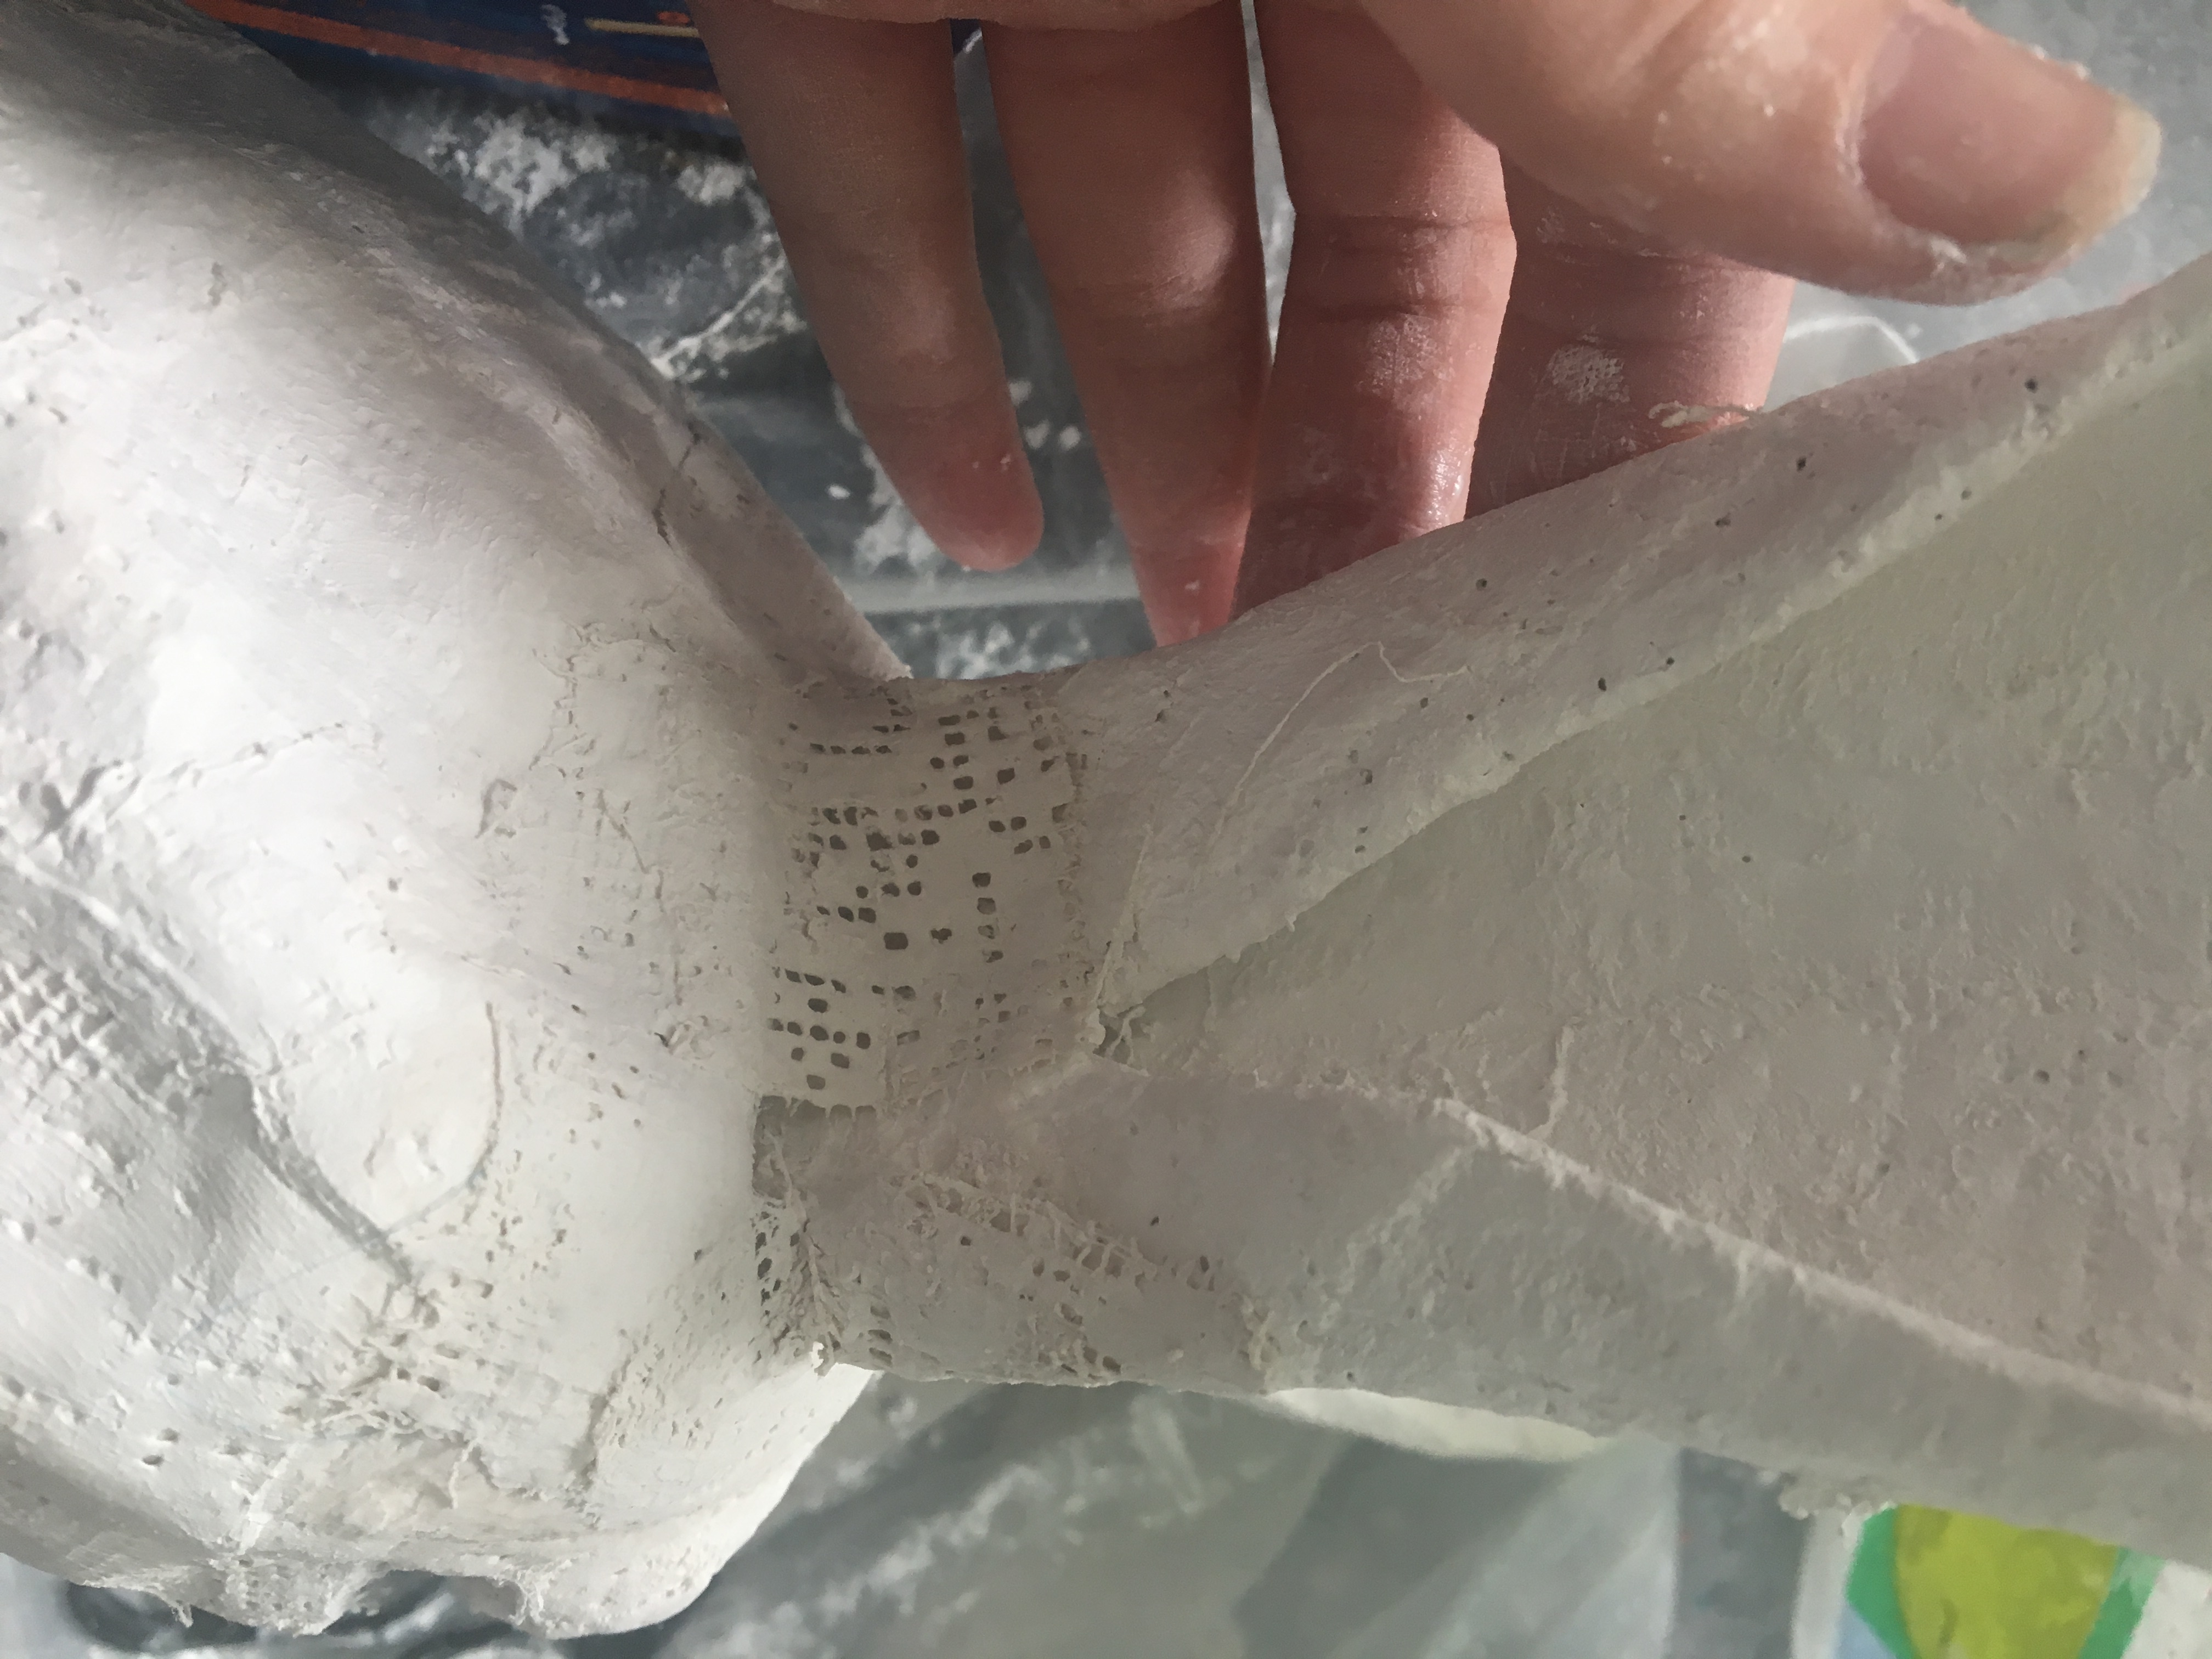
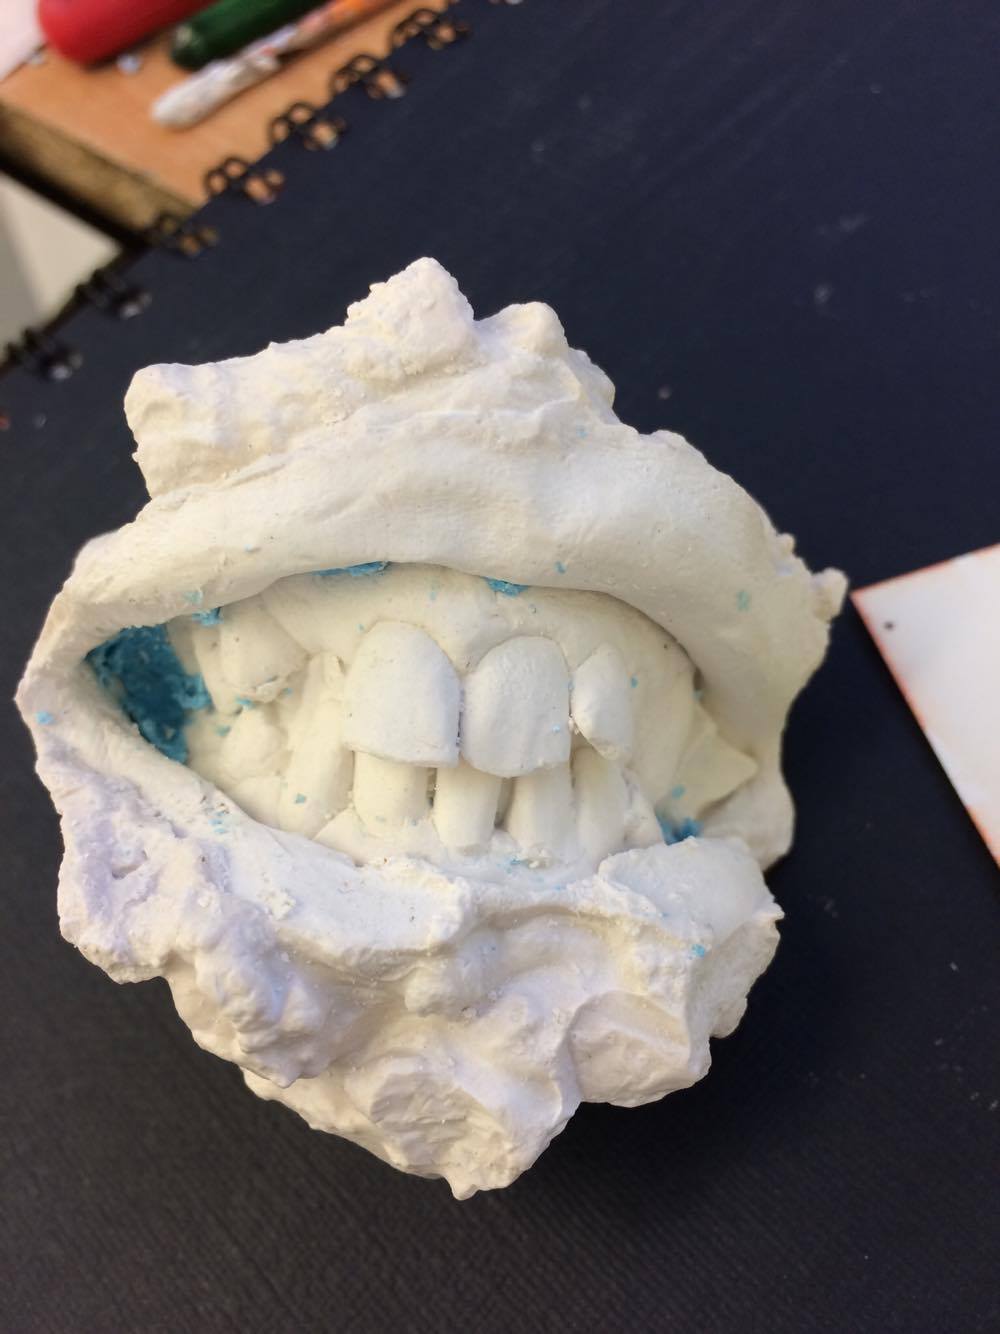
What i want to make for the Cheshire Cat is a big grin. This is due to the fact that that is what the Cheshire Cat is mainly associated with. My current idea to make the grin is that i will make lots of alienate casts of either many different people, or just my own sets of teeth. I will then arrange all the casts together to make a bigger grin. What i like about the alienate casts is that it is able to capture every little detail making the end result look more realistic. I have seen one of my peers do a mouth cast before in a previous project so i know that it is possible to do. You can see a photo of this below. With the casts they would be made out of plaster and i will leave them completely white so that they are the brilliant white of the plaster rather than painting them more realistic colours, I’m choosing this due to the fact that the paint never quite looks right over the top of plaster. At this current moment in time I am unsure if i will attach them together or if i will have them hung up individually with fishing wire, so that the grin looks like it is floating in the air.

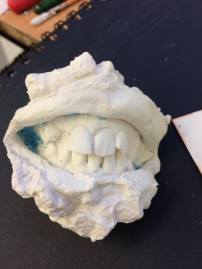
Photo/Sculpture credit: Julie Taylor

The Queen of Hearts

For the Queen of hearts i am planning on making her out of old valentines/love gifts that i can find in charity shops. I have chosen this as my medium as i find it amusingly sad that these gifts that were once bought as a gift of love has now been discarded into a charity shop, indicating that this love is now over or that it was unappreciated to begin with. I feel that these objects fit the Queen of hearts well as she should be associated with love, being that she is the queen of hearts after all. however due to her cruel and angry nature she isn’t. Currently i am unsure what i will do with the items to create the Queen. my ideas on how she could look are; 1 She could be made on a 2d canvas much like the teddy face that i produced in a previous project. 2 she could have a dress made out of the teddies and her body could just be that of a mannequin. 3 she could be made entirely out of the teddies.

The White Rabbit

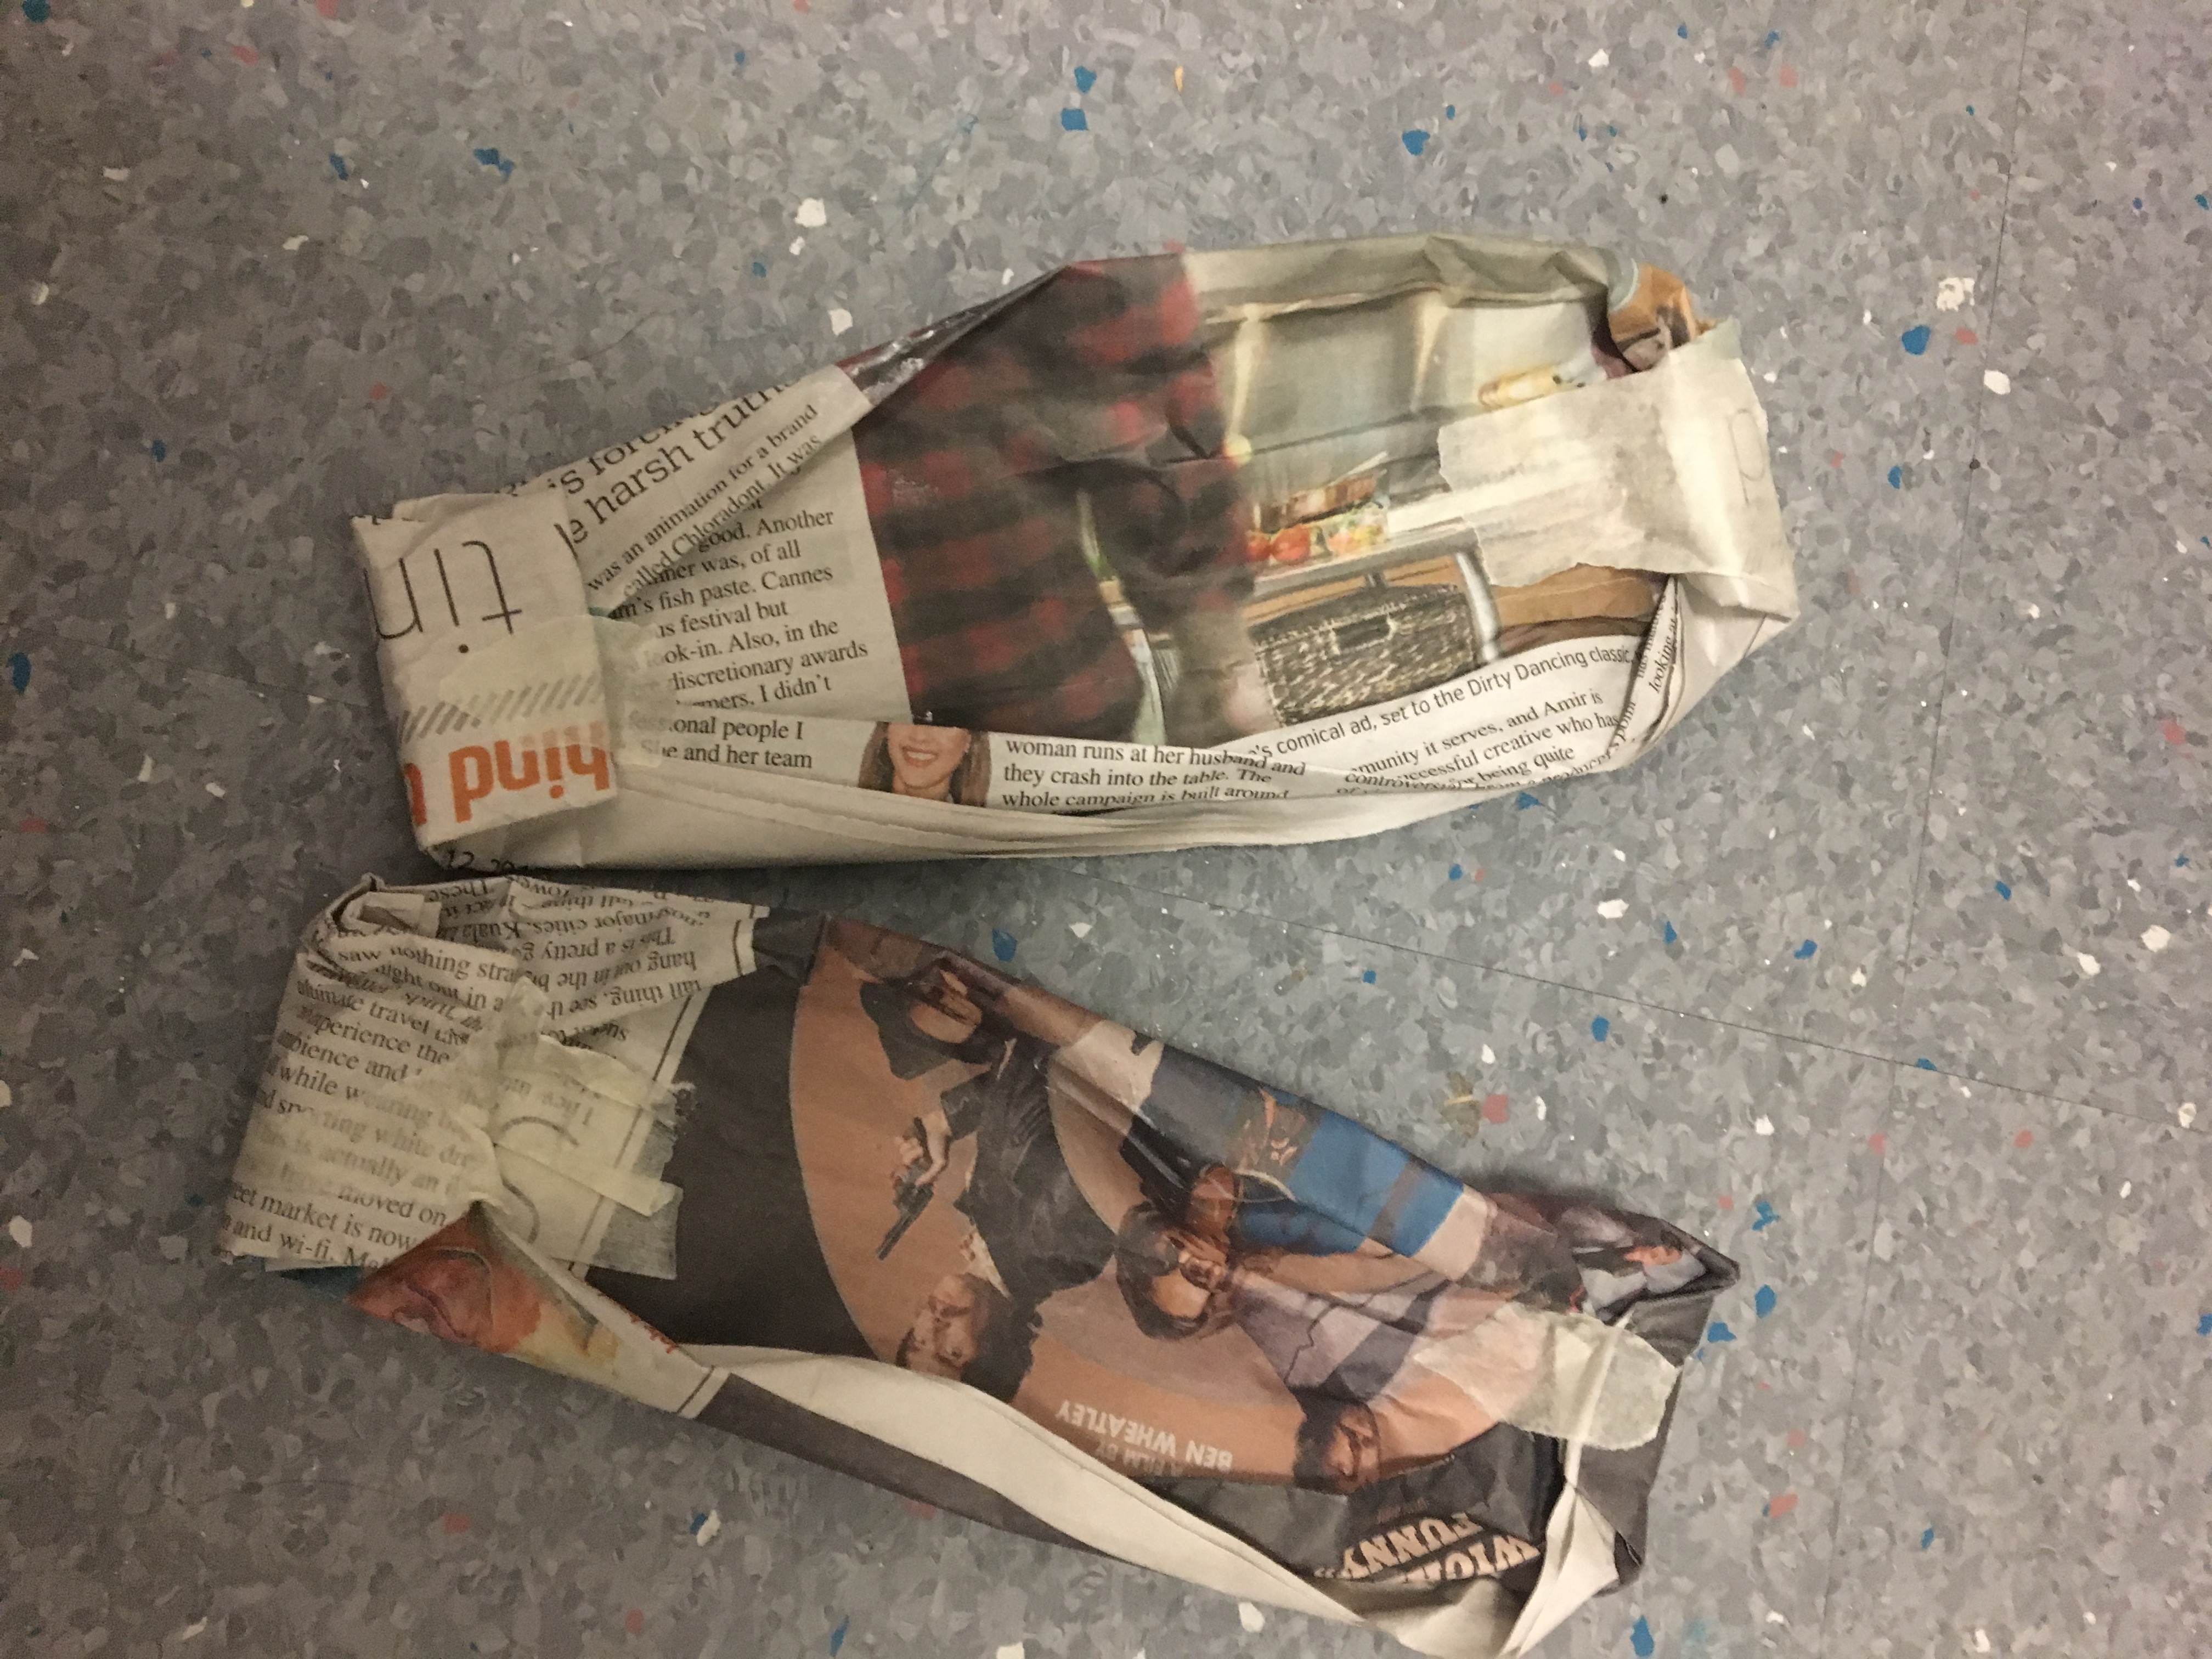
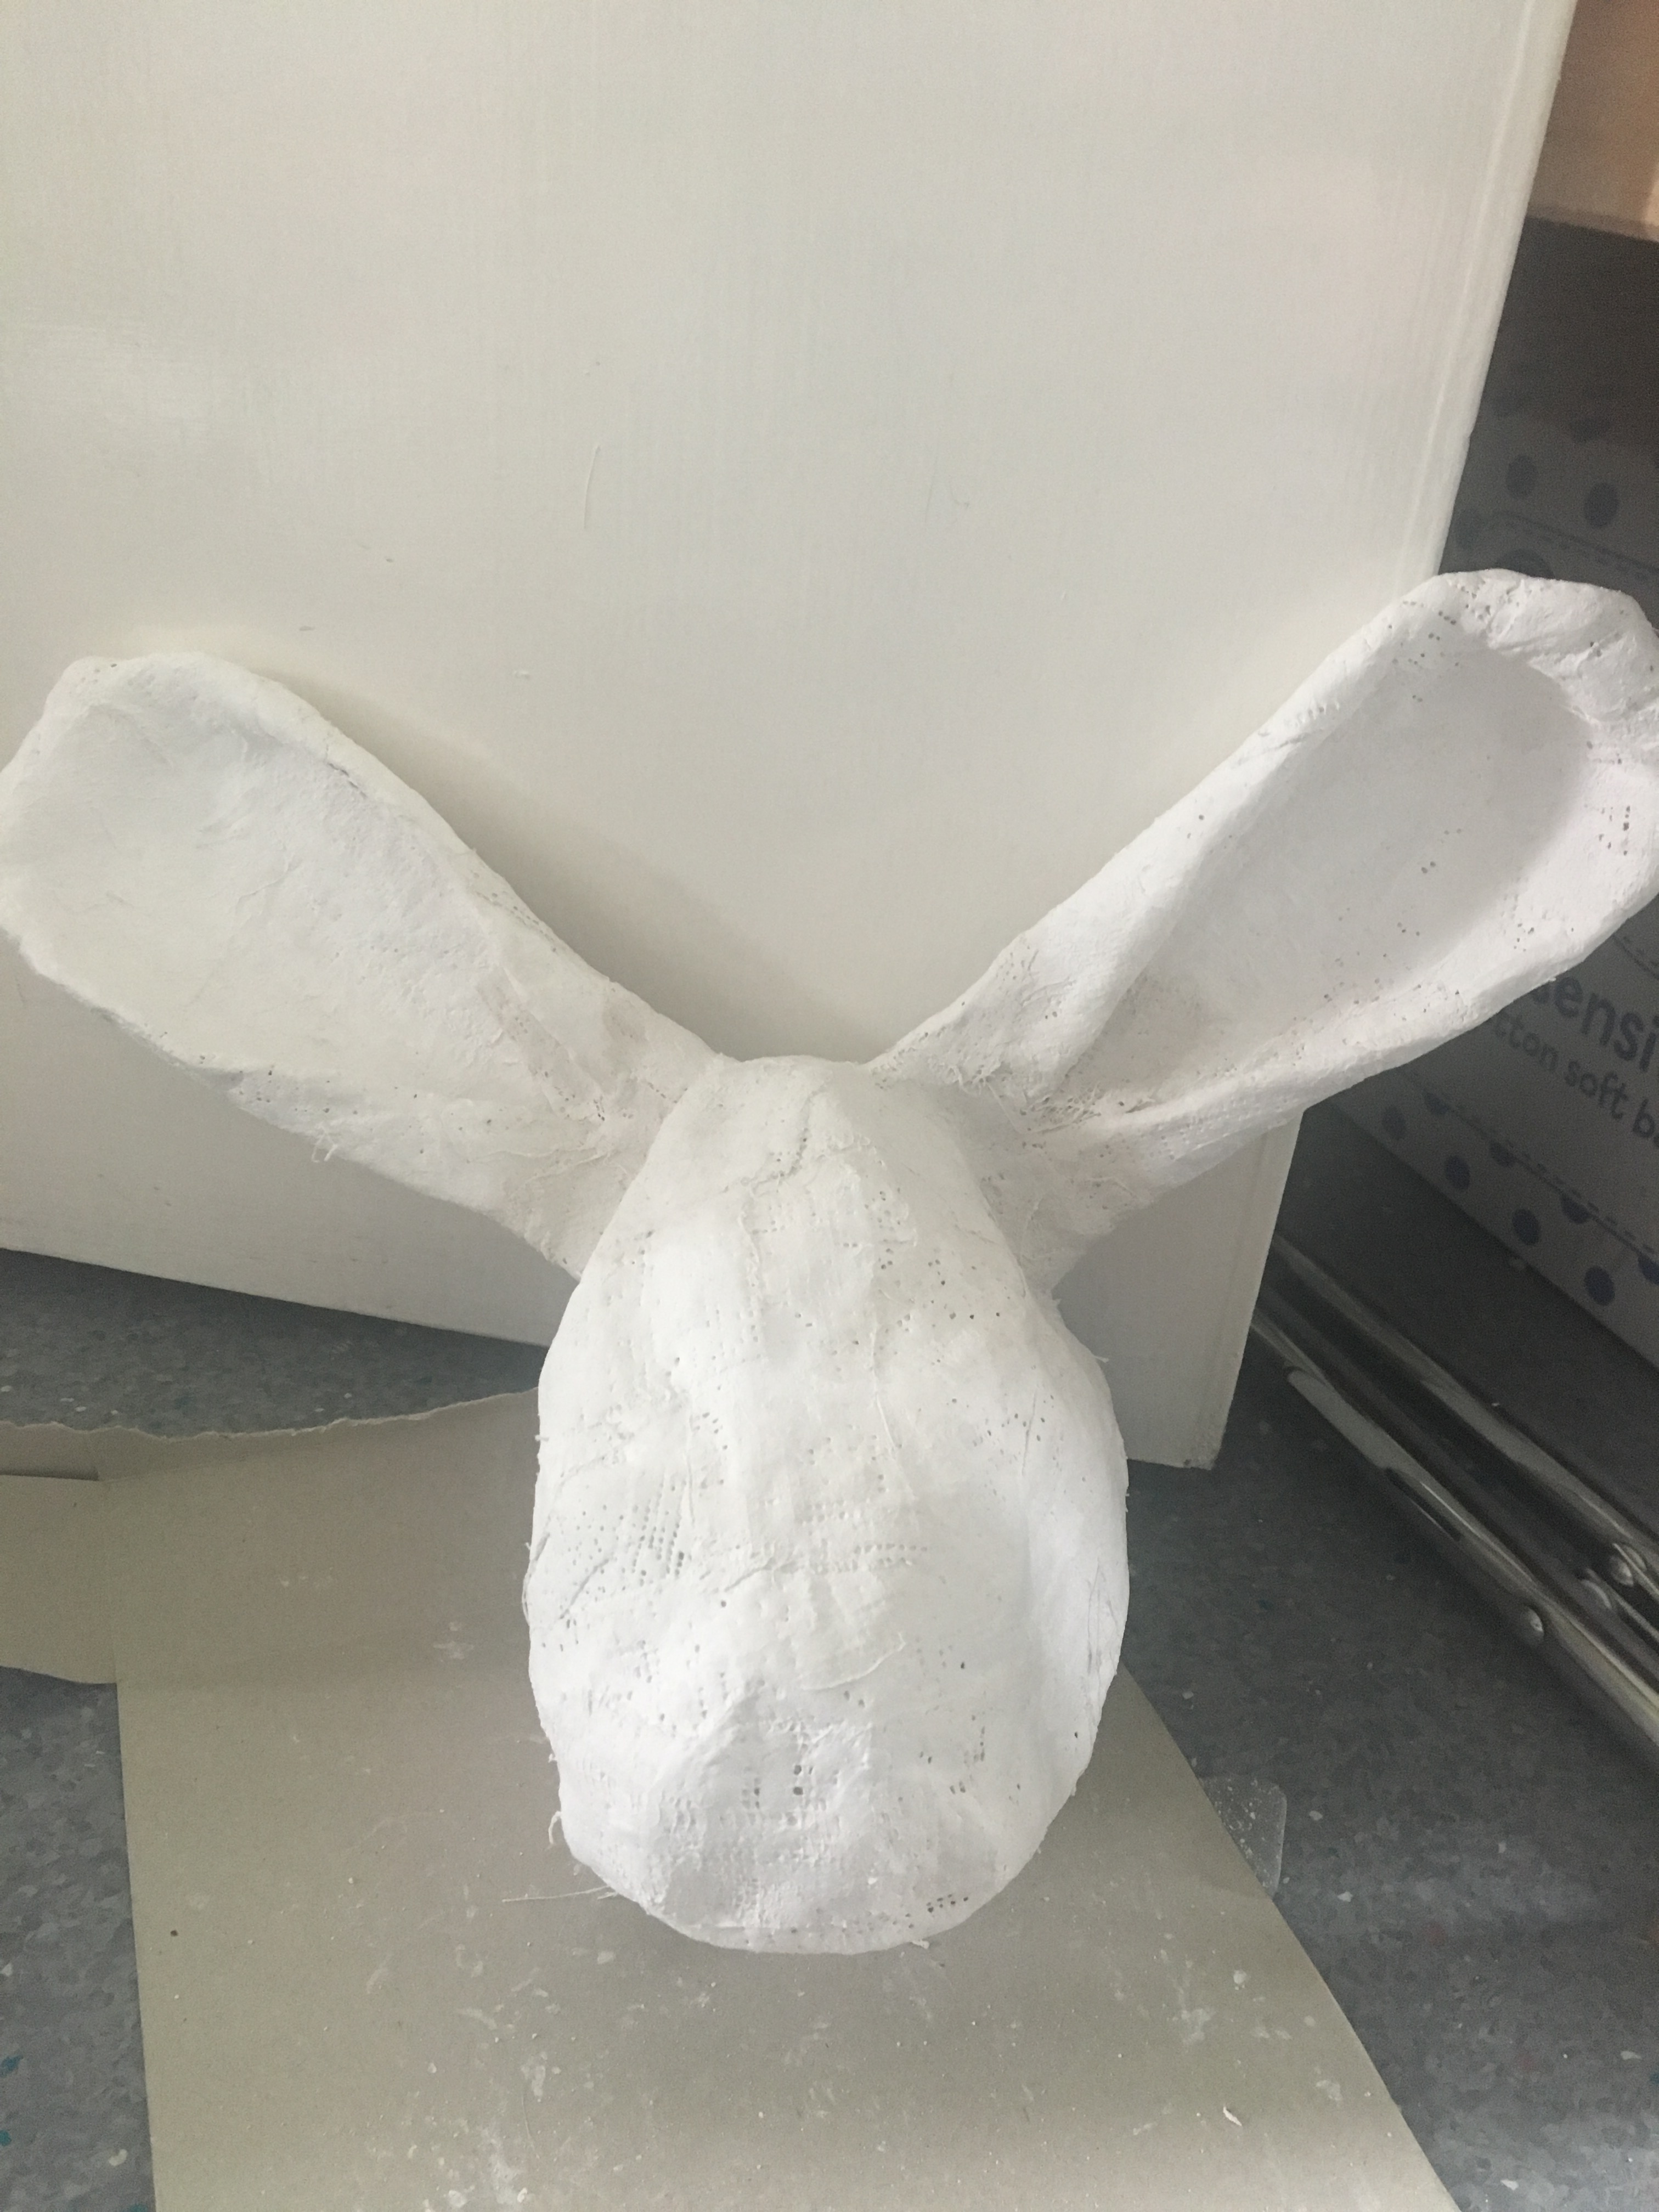
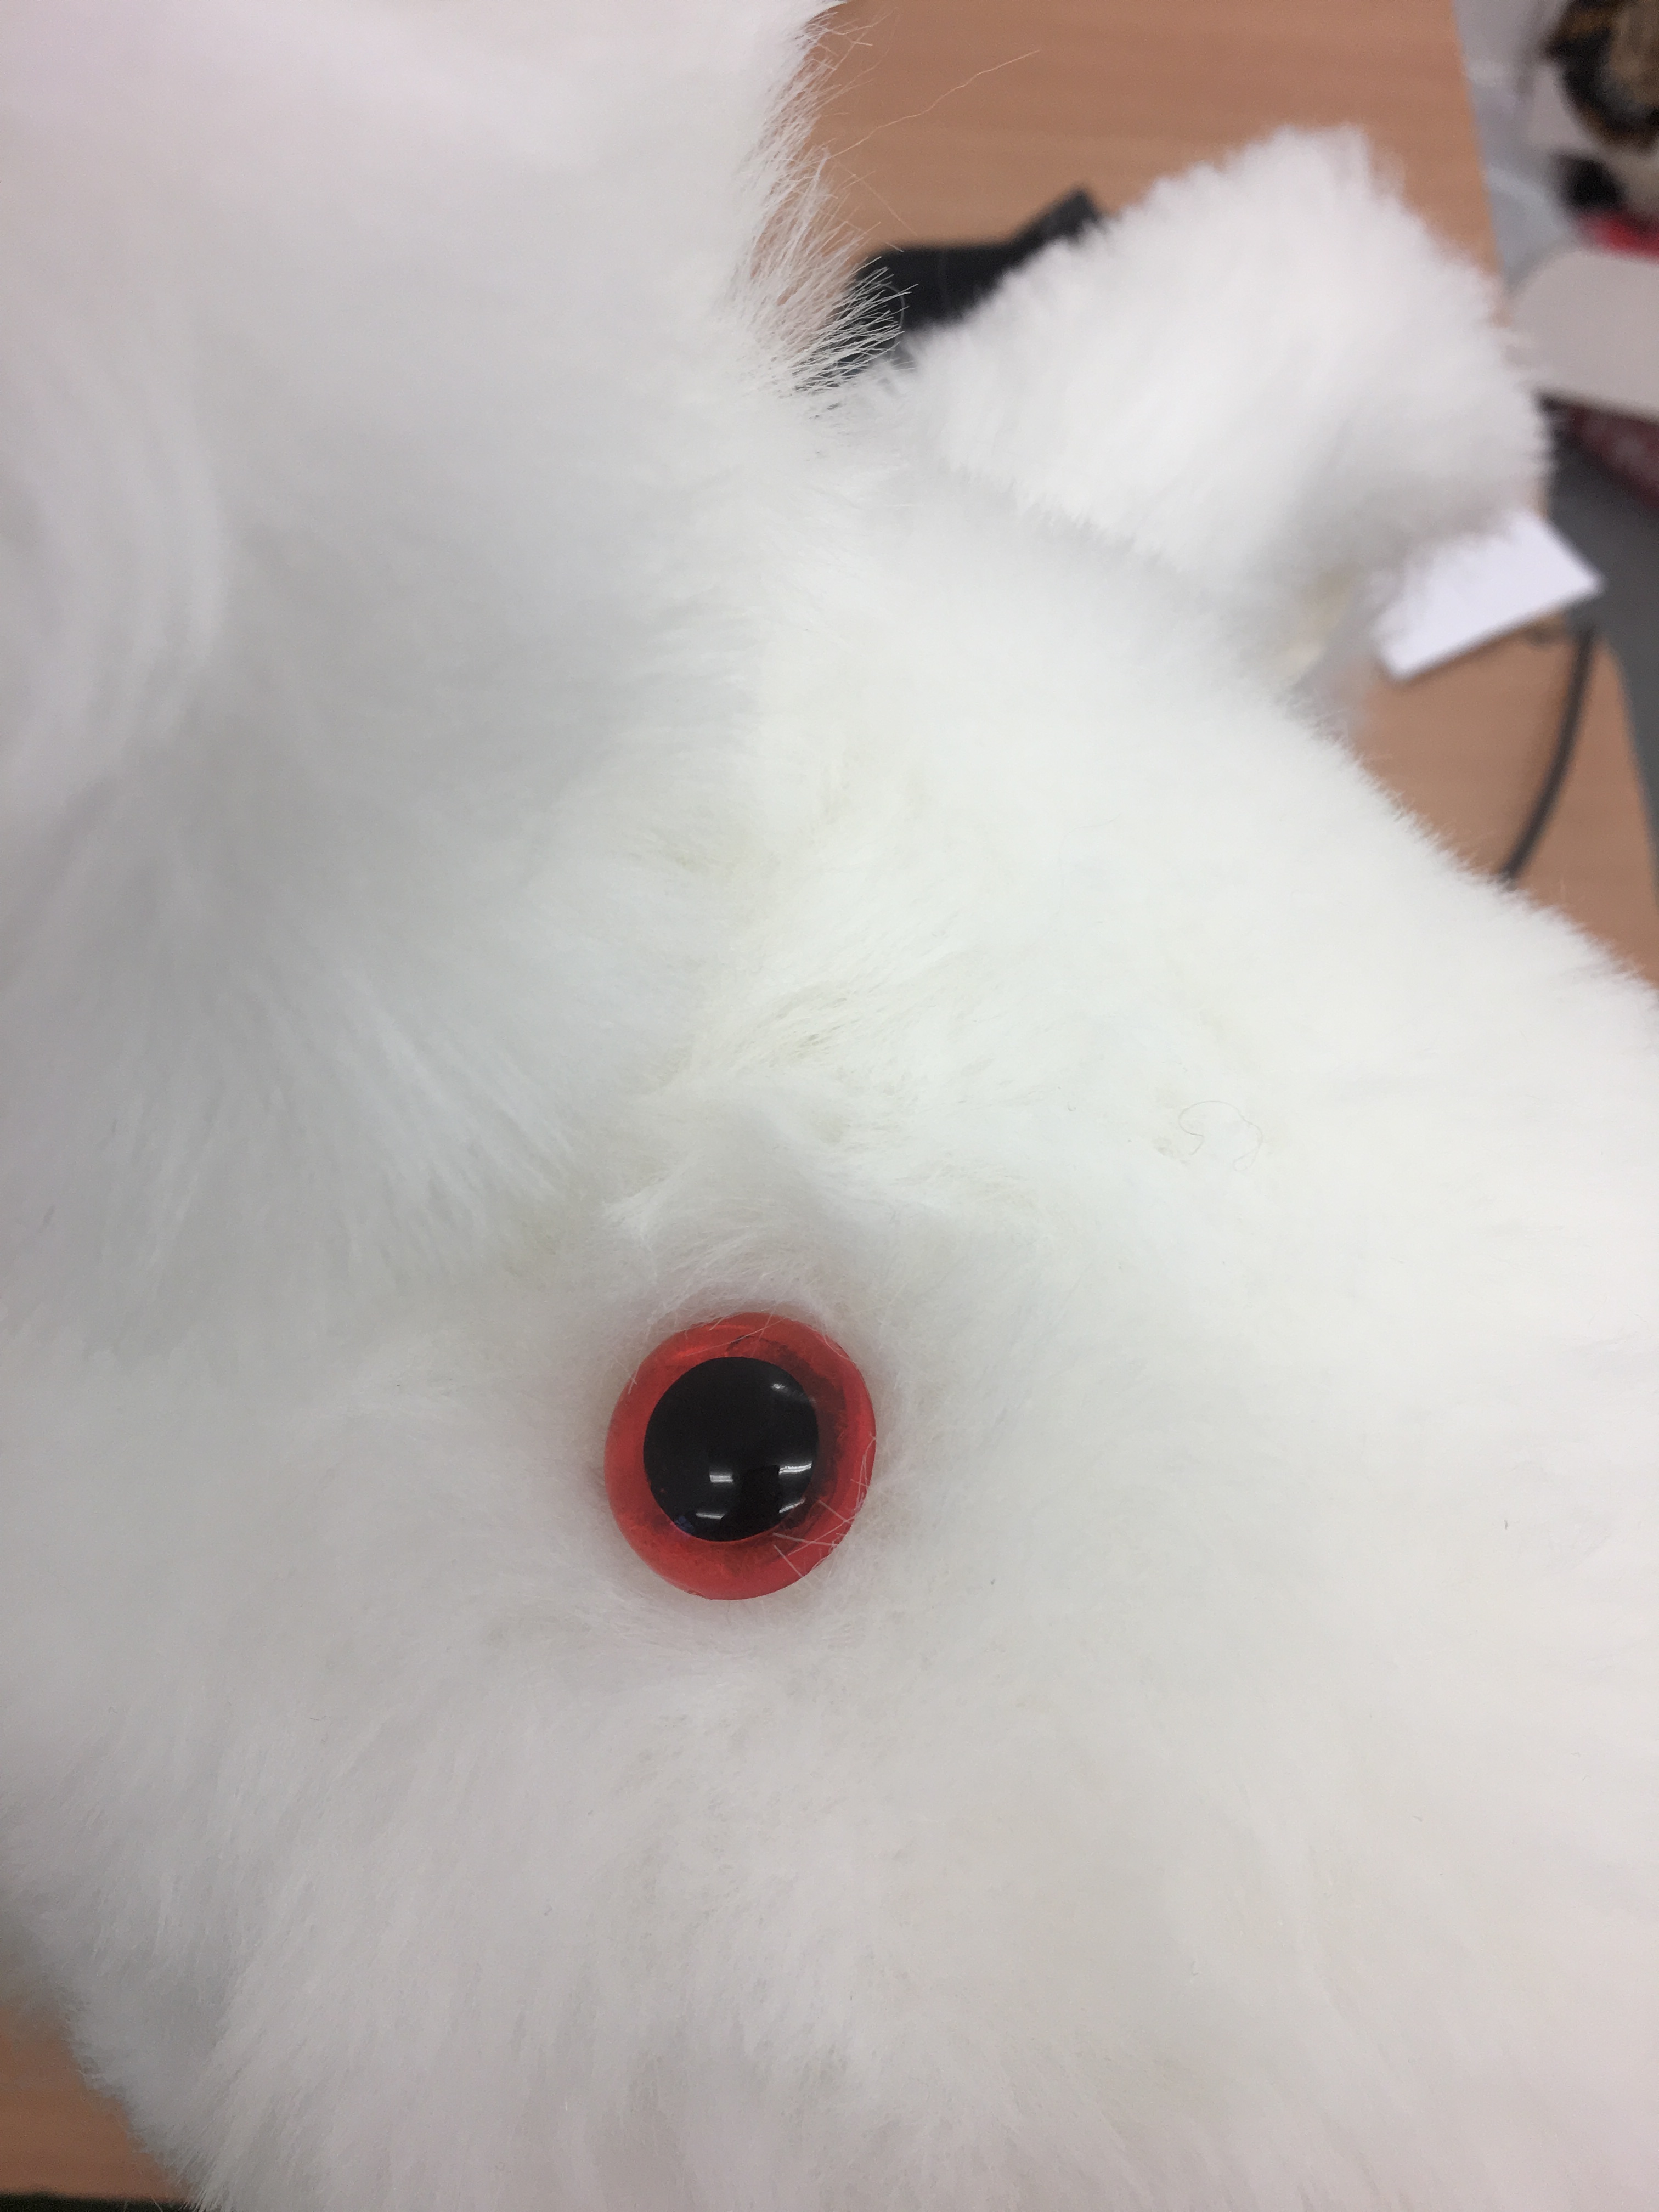
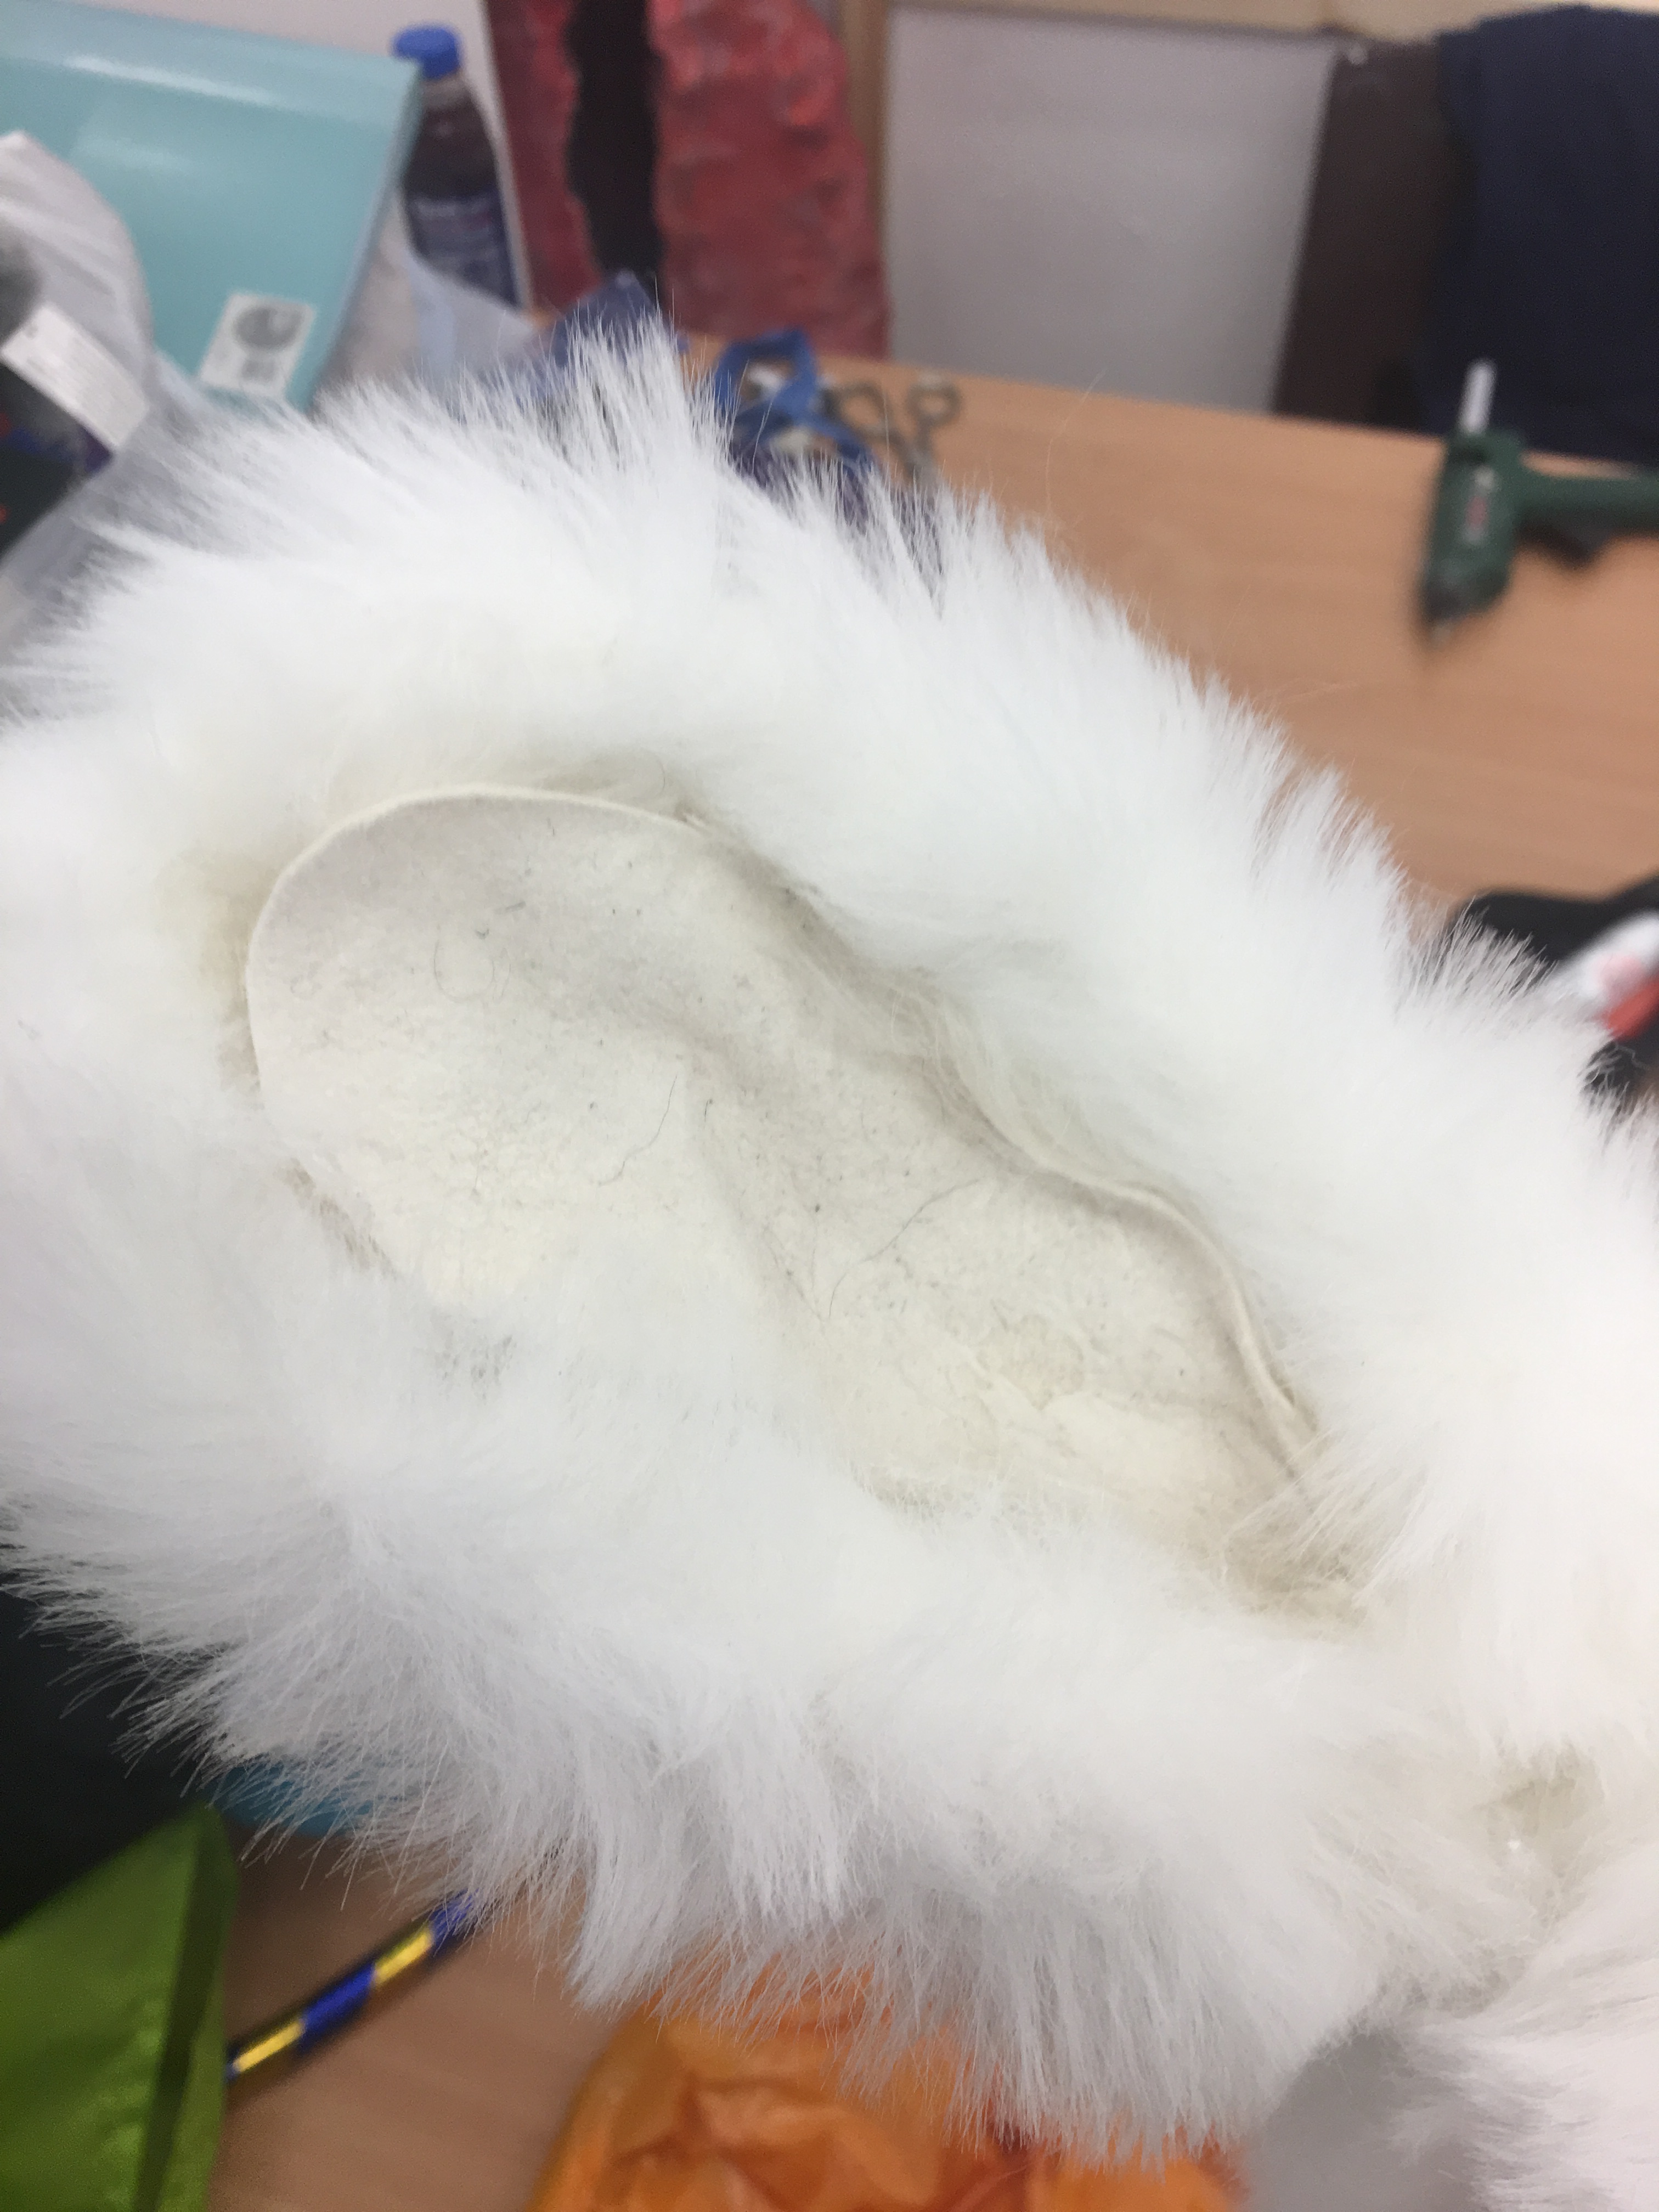
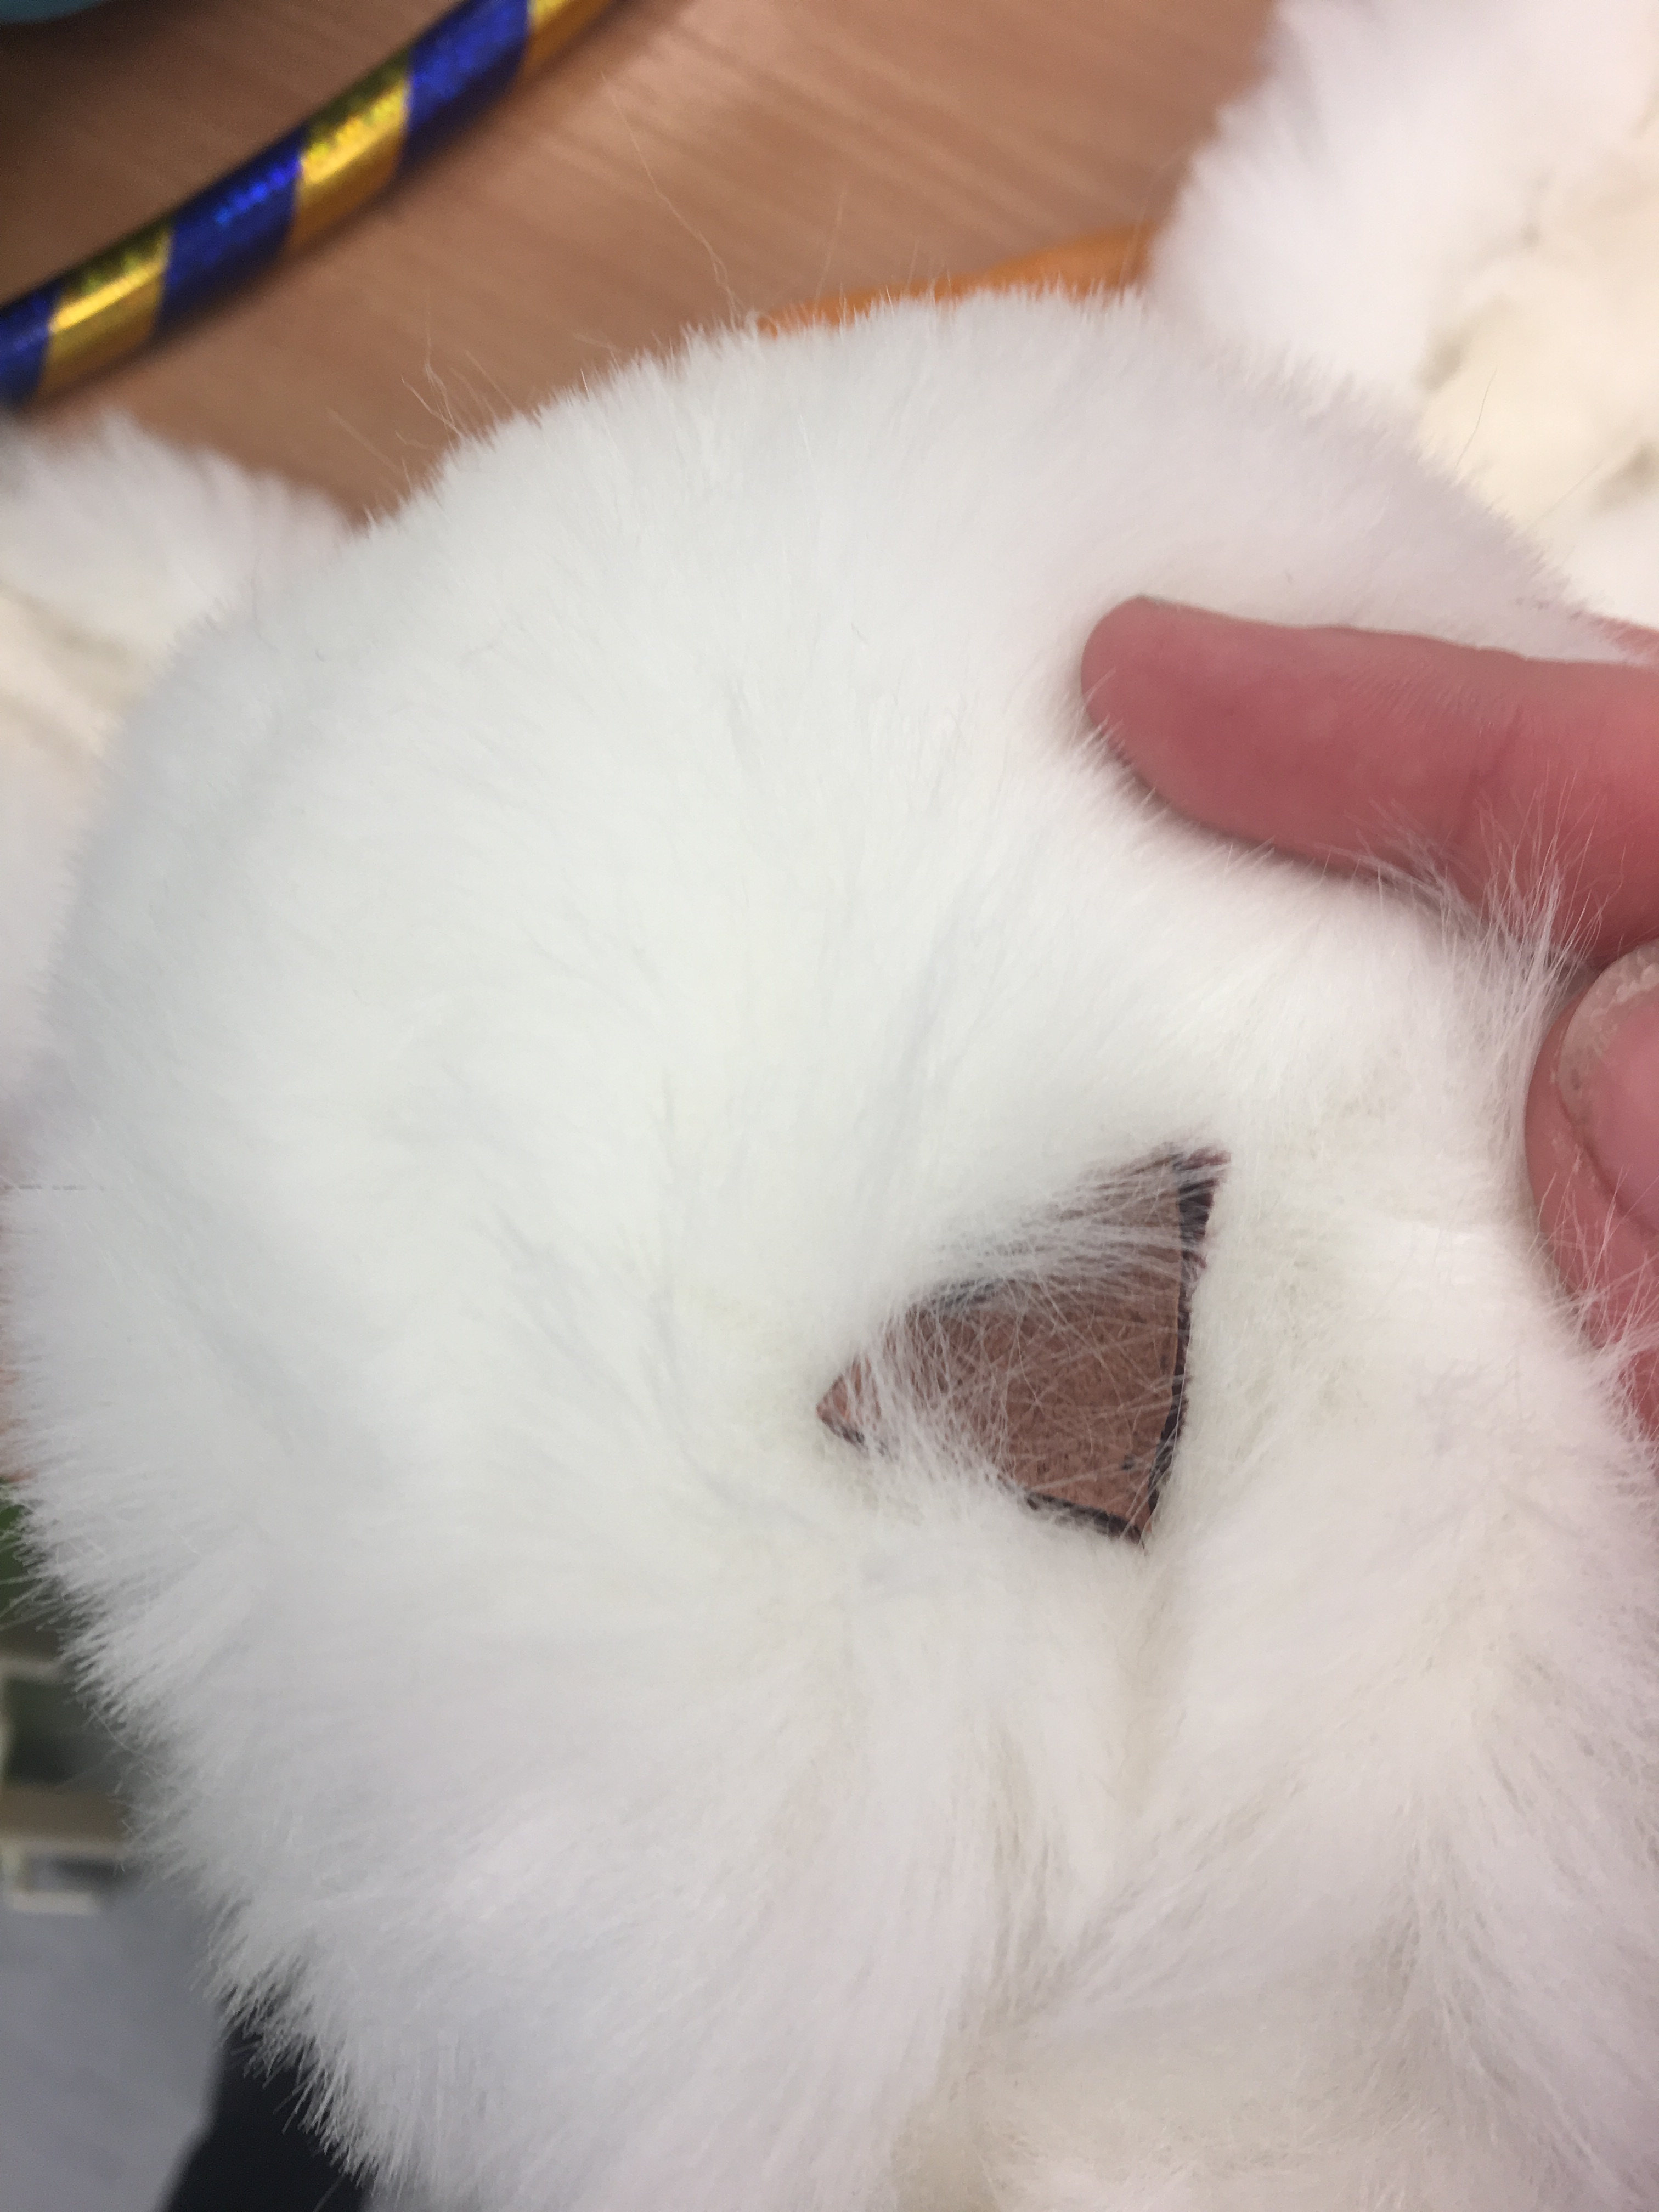
For the white rabbit i am thinking that i will make just his head using the same technique i did for ‘Meat Dog’ in a previous project. I do this by making a basic shape out of newspaper then solidifying it with mod roc. i am planning on making it out of the left over rabbit fur i have from the ‘meat dog’ project. However i don’t have any white rabbit fur so i will need to find out if there is a way of bleaching the fur to turn it white. The reason i have chose to only make the rabbits head and not the whole rabbit is because of the Queen’s famous saying of ‘Off with his head!’ to anyone that wrongs her.

The Mad Hatter 

For the mad hatter I am wanting to make him out of hats. I want it to look as if the hatter has been buried underneath all the hats that he has made. I have chosen hats as my material for the obvious reason of his association with hats, being that he is a hatter. Similar to the working styles of Tim Noble and Sue Webster who use rubbish to create their figures, however in their work the rubbish is less defined but the shadow is very detailed. In my work i won’t be producing a shadow so i need my initial figure to be more defined so that it is recognisable as a human figure and not just a messy pile of hats.

The Caterpillar 

My idea for the caterpillar is to make him out of Vape pens. This is because the caterpillar is seen smoking a Hookah pipe, in the book and in all film adaptations. I feel that Vape pens are like a modern day hand held version of the hookah pipe. However i am limited by being able to source enough of these off of people who smoke them as to but them new they are expensive and i wouldn’t be able to afford enough of them. My backup idea for if i cannot source enough of the pens is to make the caterpillar out of shoes as caterpillars have 16 legs. Shoes would be a lot cheaper and easier to source however i would much rather do my first idea.

Alice

For Alice i am not going to be making a piece of work to represent her. The reason i have chosen to do this is because in the book/films it is Alice’s adventures in wonderland. and you see the story along with her. So for my piece i want it to be the viewers adventures in wonderland. In a way making the viewer be Alice.